
前言
主力机换了台 Mac M4 Pro,因为架构和版本的原因,软件和工具的配置都需要摸索,于是记录一下部分环境配置的过程
参考:
https://www.cnblogs.com/simono/p/16629284.html
Basic
限制解除
https://sysin.org/blog/macos-if-crashes-when-opening/
设置允许任何来源的 app 运行
sudo spctl --master-disable运行命令后打开设置,找到隐私与安全性,修改来源
移除应用的安全隔离属性
用于解决修改了应用的 Contents 内容后无法启动的问题
sudo xattr -dr com.apple.quarantine /Applications/name.app如果运行完上面的命令还无法启动,则需要重新签名:
sudo codesign --force --deep --sign - /Applications/name.app快捷操作
- 命令行中,ctrl+a 可以直接使光标跳转到开头
- opt + -> 可以直接使光标跳转到下一个单词
- 查看 socket 命令建议使用
lsof
必备工具
Homebrew
Mac 下的包管理器,无需多言
/bin/bash -c "$(curl -fsSL https://raw.githubusercontent.com/Homebrew/install/HEAD/install.sh)"oh_my_zsh
https://www.haoyep.com/posts/zsh-config-oh-my-zsh/
sh -c "$(curl -fsSL https://raw.githubusercontent.com/ohmyzsh/ohmyzsh/master/tools/install.sh)"可以使用 z 命令实现快速跳转到曾经访问过的文件夹
内置插件:z,x(extract),web-search,jsontools
三方插件:zsh-autosuggestions,zsh-syntax-highlighting
主题配置,以 powerlevel10k 主题为例
git clone --depth=1 https://github.com/romkatv/powerlevel10k.git "${ZSH_CUSTOM:-$HOME/.oh-my-zsh/custom}/themes/powerlevel10k"修改 ~/.zshrc 中 ZSH_THEME 的值为 powerlevel10k/powerlevel10k,然后执行 p10k configure 进行配置即可
jordanbaird-ice
修改顶部栏小图标限制
Mos
优化鼠标指针逻辑,装一个不亏
HoRNDIS
用于安卓通过 USB 给 Mac 提供热点
开发环境
FlyEnv
对 web 手要配各种环境来说帮大忙了
支持随时切换全局的语言版本
docker
Mac 中直接 ifconfig 看不到 docker 的宿主机 ip,容器可以通过特殊的域名 host.docker.internal 来访问宿主机 IP 地址,无需知道具体的 IP 地址,实际上也可以直接 ping 这个域名来获取宿主机 IP 地址 192.168.65.254
java
https://www.oracle.com/cn/java/technologies/javase/javase8-archive-downloads.html
brew 源的 jdk8 只支持 x64,所以需要直接在官网上安装,注意国内的 jdk8u65 包会重定向到 8u111
python
pyenv
brew install pyenv
pyenv install 2.7.18
export PATH="$(pyenv root)/shims:${PATH}"
pyenv global 2.7.18
python --version
echo 'PATH=$(pyenv root)/shims:$PATH' >> ~/.zshrc
uv
python 包管理器建议直接使用 uv
迁移:
uv 不支持 python2 的下载和安装,所以 python2 的环境需要继续使用 pyenv
pipx 的工具迁移到 uv tool,先查看 pipx 下的工具对应版本,然后卸载
pipx list
pipx uninstall
接下来在 uv 中安装对应版本:
uv tool install . --python 3.10
uv tool install git+https://github.com/mrexodia/ida-pro-mcp --python 3.13
uv tool install dirsearch --with setuptools
Obsidian
Mac 上 typora 的激活码不好找(虽然可以改 js 但是还是有弹窗看着难受),索性投身于 obsidian 的怀抱
主题:blue topaz
插件:
- attachment management:配合本人写 hexo 博客的需求来保存图片
- easy typing
- heading shifter
Typora 1.9.4 学习版: https://github.com/fadelover/typora-activation/tree/main
自带命令替换
grep 替换
grep 有 BSD 和 GNU 两个版本,支持的参数不一样,GNU 才支持 -P 参数进行正则匹配,直接换成 GNU 版本
brew install grep然后修改环境变量配置文件
export PATH="/opt/homebrew/opt/grep/libexec/gnubin:$PATH"之后重载终端即可
. ~/.zshrctar 替换
https://thiscute.world/posts/common-commands-for-various-operating-systems/
brew install gnu-tarWeb
PHPStorm
配置命令行启动
方便在命令行下打开文件夹
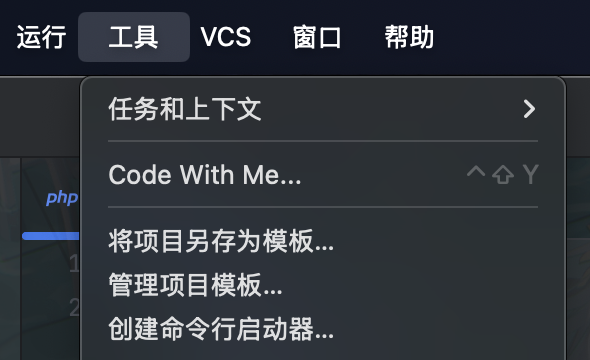
要使 IDE 可从命令行访问,请将 '/Applications/PhpStorm.app/Contents/MacOS' 添加到 $PATH 变量,然后使用 'phpstorm' 运行命令。那么在 .zshrc 里加一行 export PATH="$PATH:/Applications/PhpStorm.app/Contents/MacOS" 即可
同理 IDEA 也是同样操作
Chrome
Proxy Switchy
要代理 localhost 的流量,需要配置不代理的地址列表为 <-loopback>
proxychains
正常通过 brew 安装的 proxychains 会遇到无法启动的问题
https://0chen.cc/2023/02/21/m1%E4%BD%BF%E7%94%A8proxychains4%E8%B8%A9%E5%9D%91/
https://cunoe.com/changelog/use-proxychains-in-macos-m-series
如果要使用 proxychains 则必须要关闭 SIP
但是此时再执行还是会报错:
dyld[35986]: terminating because inserted dylib '/opt/homebrew/Cellar/proxychains-ng/4.17/lib/libproxychains4.dylib' could not be loaded: tried: '/opt/homebrew/Cellar/proxychains-ng/4.17/lib/libproxychains4.dylib' (mach-o file, but is an incompatible architecture (have 'arm64', need 'arm64e')), '/System/Volumes/Preboot/Cryptexes/OS/opt/homebrew/Cellar/proxychains-ng/4.17/lib/libproxychains4.dylib' (no such file), '/opt/homebrew/Cellar/proxychains-ng/4.17/lib/libproxychains4.dylib' (mach-o file, but is an incompatible architecture (have 'arm64', need 'arm64e')
个人的解决办法:
在关闭 SIP 后,先启用 arm64e 架构支持
sudo nvram boot-args=-arm64e_preview_abi
sudo reboot
然后自行编译 proxychains-ng
git clone https://github.com/rofl0r/proxychains-ng && cd proxychains-ng

CFLAGS="-arch arm64e" LDFLAGS="-arch arm64e" ./configure --prefix=/usr/local --bindir=/usr/local/bin --libdir=/usr/local/lib --fat-binary-m1

make
接下来替换 libproxychains4.dylib 到 homebrew 下就行
sudo cp libproxychains4.dylib /opt/homebrew/Cellar/proxychains-ng/4.17/lib/libproxychains4.dylibcrackmapexec
注意不要使用 python 3.9 安装,会警告 NotOpenSSLWarning: urllib3 v2 only supports OpenSSL 1.1.1+, currently the 'ssl' module is compiled with 'LibreSSL 2.8.3'. See: https://github.com/urllib3/urllib3/issues/3020
git clone https://github.com/byt3bl33d3r/CrackMapExec.git
cd CrackMapExec
pip3.10 install pipx
python3.10 -m pipx install .
hashpump
从 brew 安装,需要先修改 brew 的源
brew edit hashpump修改为下面的内容
class Hashpump < Formula
  desc "Tool to exploit hash length extension attack"
  homepage "https://github.com/mheistermann/HashPump-partialhash"
  # url "https://github.com/bwall/HashPump/archive/refs/tags/v1.2.0.tar.gz"
  url "https://github.com/mheistermann/HashPump-partialhash.git"
  version "1.2.0"
  # sha256 "d002e24541c6604e5243e5325ef152e65f9fcd00168a9fa7a06ad130e28b811b"
  license "MIT"
  revision 7

  no_autobump! because: :requires_manual_review

  bottle do
    sha256 cellar: :any,                 arm64_ventura:  "ee4e8e386dbf585e9672aabb460e44e0a3ba40486d71443200912c1e39e95ad5"
    sha256 cellar: :any,                 arm64_monterey: "63cf0b6889738999549fbaec92d5a6659c7e67243e6c1d8c6de327a625aec770"
    sha256 cellar: :any,                 arm64_big_sur:  "462e0b0b6d802d8b63a5179525830a7a2b653e508447c3a3c6c1e49fa644e173"
    sha256 cellar: :any,                 ventura:        "4719aeb4e527d69dec4a39e3ebd572f5e3a75997771fa7bdb7b95d8ef1a0d52c"
    sha256 cellar: :any,                 monterey:       "c947cdf5337bf9b01d58bfab17640121972ecda945c19142296d94738a7a637a"
    sha256 cellar: :any,                 big_sur:        "680680ea8ab91083953e359b7fb74bd8195e4d9c94fdb3c351741d90983f72c8"
    sha256 cellar: :any_skip_relocation, x86_64_linux:   "542fd495cbe83aed52b7766926946f923d1e395f46cb4245b6ac6387cbeb0276"
  end

  # disable! date: "2024-09-16", because: :repo_removed

  depends_on "openssl@3"
  # depends_on "python@3.11"

  # Remove on next release
  # patch do
  #   url "https://github.com/bwall/HashPump/commit/1d76a269d18319ea3cc9123901ea8cf240f7cc34.patch?full_index=1"
  #   sha256 "ffc978cbc07521796c0738df77a3e40d79de0875156f9440ef63eca06b2e2779"
  # end

  # Fix compatibility with Python 3.10 and later.
  # SystemError: PY_SSIZE_T_CLEAN macro must be defined for '#' formats
  # PR ref: https://github.com/bwall/HashPump/pull/25
  # patch :DATA

  #def python3
  #  "python3.11"
  #end

  def install
    bin.mkpath
    system "make", "INSTALLLOCATION=#{bin}", "install"
    #system python3, "-m", "pip", "install", *std_pip_args, "."
  end
然后安装
HOMEBREW_NO_INSTALL_FROM_API=1 brew install --build-from-source hashpump接下来安装 python 的 hashpumpy
export OPENSSL_ROOT_DIR=$(brew --prefix openssl)
export LDFLAGS="-L${OPENSSL_ROOT_DIR}/lib"
export CPPFLAGS="-I${OPENSSL_ROOT_DIR}/include"
uv pip install hashpumpy
MemoryAnalyzer
需要 java 17
https://blog.mattclemente.com/2024/11/11/install-eclipse-memory-analyzer-macos/
<string>-vm</string>
<string>/opt/homebrew/Cellar/openjdk@17/17.0.15/libexec/openjdk.jdk/Contents/Home/bin/java</string>
GTFObins
主要是 ruby 相关的配置,这里使用 rbenv 比较好管理版本
brew install rbenv
export PATH=$(rbenv root)/shims:$PATH
首先 clone 仓库: https://github.com/GTFOBins/GTFOBins.github.io
git clone https://github.com/GTFOBins/GTFOBins.github.io.git
cd GTFOBins.github.io
接下来配置 ruby,这里版本选择 2.7.8
rbenv install 2.7.8
rbenv local 2.7.8
gem sources --add https://mirrors.tuna.tsinghua.edu.cn/rubygems/ --remove https://rubygems.org/
bundle config mirror.https://rubygems.org https://mirrors.tuna.tsinghua.edu.cn/rubygems
echo 'gem "ffi", "~> 1.16.3"' >> Gemfile
bundle install
bundle exec jekyll serve --port 24000
CodeQL
为什么 mac 的 codeql 要 1 个 g(
Binary
IDA Pro 9.1
https://mrx.hk/posts/0f4e4b9537a2da059095327c45b5b227/
UTM
用于启动跨架构虚拟机
这里安装 x86_64 的 ubuntu 20.04
https://byesec.com/posts/5aa3009d.html#2%E3%80%81%E9%95%9C%E5%83%8F%E9%80%89%E6%8B%A9
一些额外操作:由于桌面环境用着太卡了还是选择 ssh 来操作
sudo apt install openssh-server
sudo service ssh start
sudo systemctl enable ssh
然后设置走宿主机的代理,宿主机这里要允许来自局域网的连接
export all_proxy=socks5://192.168.64.1:7890Vmware 迁移到 UTM
参考:
https://xzajyjs.cn/2023/07/17/ova_to_vmdk/index.html
如果是一个 ova 文件,则需要先解压出里面的 vmdk
qemu-img convert -O qcow2 QuTScloud_c5.1.0.2498-disk1.vmdk QuTScloud_c5.1.0.2498-disk1.qcow2JADX
需要 java 11 以上版本
brew install jadx然后安装 jadx mcp: https://github.com/zinja-coder/jadx-ai-mcp
Docker Pwn 环境搭建
参考: https://ctf-wiki.org/pwn/linux/user-mode/environment/#docker
Dockerfile(apt-get install 时一定要分开装,不然哪个包超时了全部白下😭)
FROM ubuntu:24.04

ARG DEBIAN_FRONTEND=noninteractive

# pre-install softwares
RUN sed -i 's@//.*archive.ubuntu.com@//mirrors.ustc.edu.cn@g' /etc/apt/sources.list.d/ubuntu.sources && \
    sed -i 's@//.*security.ubuntu.com@//mirrors.ustc.edu.cn@g' /etc/apt/sources.list.d/ubuntu.sources
RUN dpkg --add-architecture i386
RUN apt-get -y update && apt-get upgrade -y
RUN apt-get install -y lib32z1 apt-transport-https
RUN apt-get install -y python3 python3-pip python3-venv python3-poetry python3-dev python3-setuptools
RUN apt-get install -y libglib2.0-dev libfdt-dev libpixman-1-dev zlib1g-dev libc6-dbg libc6-dbg:i386 libgcc-s1:i386
RUN apt-get install -y vim nano netcat-openbsd openssh-server git unzip curl tmux konsole wget sudo
RUN apt-get install -y bison flex build-essential gcc-multilib
RUN apt-get install -y qemu-system-x86 qemu-user qemu-user-binfmt
RUN apt-get install -y gcc gdb gdbserver gdb-multiarch clang lldb make cmake

# enable ssh login
RUN rm -f /etc/service/sshd/down
RUN sed -ri 's/^#?PermitRootLogin\s+.*/PermitRootLogin yes/' /etc/ssh/sshd_config &&\
    sed -ri 's/#UseDNS\ no/UseDNS\ no/g' /etc/ssh/sshd_config && \
    sed -ri "s/StrictModes yes/StrictModes no/g" /etc/ssh/sshd_config && \
    sed -ri "s/UsePAM yes/UsePAM no/g" /etc/ssh/sshd_config

# enable login with password
RUN echo 'PasswordAuthentication yes' >> /etc/ssh/sshd_config

# defaultly we have a user `ubuntu` in the image
RUN echo "ubuntu:123456" | chpasswd && \
    echo "root:123456" | chpasswd

# add sudo
RUN usermod -aG sudo ubuntu

# enable ssh key login
RUN mkdir /home/ubuntu/.ssh && \
   echo "Your ssh key" > /home/ubuntu/.ssh/authorized_keys

# keep container running
RUN echo "#!/bin/sh\nservice ssh restart\nsleep infinity" > /root/start.sh
RUN chmod +x /root/start.sh

# create venv for pip
RUN python3 -m venv /pip_venv && \
    chown -R ubuntu:ubuntu /pip_venv && \
    echo "\n\n# pip venv\nsource /pip_venv/bin/activate" >> /home/ubuntu/.bashrc

# pwn-related tools
RUN /pip_venv/bin/pip config set global.index-url http://pypi.tuna.tsinghua.edu.cn/simple && \
    /pip_venv/bin/pip config set global.trusted-host pypi.tuna.tsinghua.edu.cn && \
    /pip_venv/bin/pip install -U pip && \
    /pip_venv/bin/pip install --no-cache-dir \
    pwntools \
    ropgadget \
    z3-solver \
    smmap2 \
    apscheduler \
    ropper \
    unicorn \
    keystone-engine \
    capstone \
    angr \
    pebble \
    r2pipe \
    LibcSearcher \
    poetry

ENV HTTP_PROXY=http://host.docker.internal:7890
ENV HTTPS_PROXY=http://host.docker.internal:7890

RUN git clone https://github.com/pwndbg/pwndbg && \
    cd pwndbg && chmod +x setup.sh && ./setup.sh

CMD ["/root/start.sh"]

EXPOSE 22
进行构建
docker build --platform=linux/amd64 -t pwnenv_ubuntu24 .然后启动容器,挂载本地目录,映射 ssh 端口
docker run \
    -d \
    -p 25022:22 \
    -v ~/Sec/Pwn/Ubuntu2404_Docker/home:/home/pwn \
    --name pwn24 \
    pwnenv_ubuntu24
再进入容器
docker exec -w /home/pwn \
        -e TERM=xterm-256color \
        -u ubuntu \
        -it pwn24 \
        bash